The Raspberry Pi is a versatile, credit card-sized computer that is used for a myriad of different projects. As a personal project of mine, I’ve tailored my Raspberry Pi 3 to be a personal VPN, network advertisement blocker, and additionally, a bad domain blocker as well. This post will go over how to perform a similar task at a high-level, specifically:
- Enable SSH on your RPi
- Setup a simple personal VPN using PiVPN
- Setup an adblocker using Pi-Hole
- Add a phishing domain feed to Pi-Hole to kickstart the bad domain blocker
- Edit the pi-hole cron job to update daily instead of weekly
NOTE: This proof-of-concept was created using a Raspberry Pi 3 Model B+ running Raspbian Buster v4.19. As of this writing, the Raspberry Pi 4 is the current model and this is the recommended model for this project (or the most current model).
SSH Setup
PiVPN Setup
Pi-Hole Setup
Pi-hole Domain Feed Configuration
SSH Setup
Straight To It
Taken directly from the Raspberry Pi SSH Documentation:
As of the November 2016 release, Raspbian has the SSH server disabled by default. It can be enabled manually from the desktop:
- Launch
Raspberry Pi Configurationfrom thePreferencesmenu - Navigate to the
Interfacestab - Select
Enablednext toSSH - Click
OK
Alternatively, raspi-config can be used in the terminal:
- Enter
sudo raspi-configin a terminal window - Select
Interfacing Options - Navigate to and select
SSH - Choose
Yes - Select
Ok - Choose
Finish
Alternatively, use systemctl to start the service
sudo systemctl enable ssh
sudo systemctl start ssh
When enabling SSH on a Pi that may be connected to the internet, you should change its default password to ensure that it remains secure. See the Security page for more details.
PiVPN Setup
Visual Guide
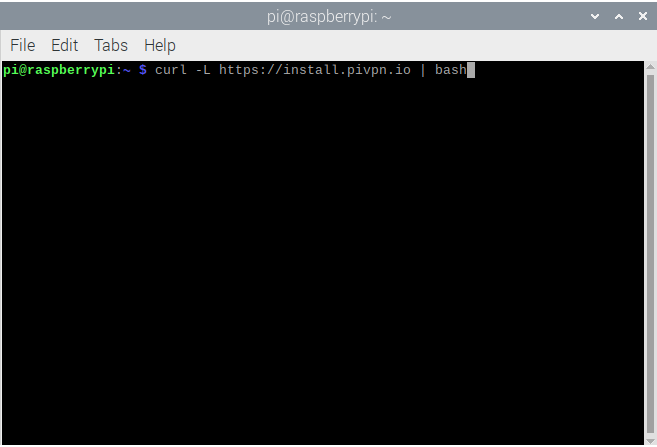
- Open a Terminal window

- Enter the following command, per the PiVPN website:
curl -L https://install.pivpn.io | bash
Note : Piping to bash (| bash) will run the install automatically. Simply run the command with it to install download and then run (curl -L https://install.pivpv.io)
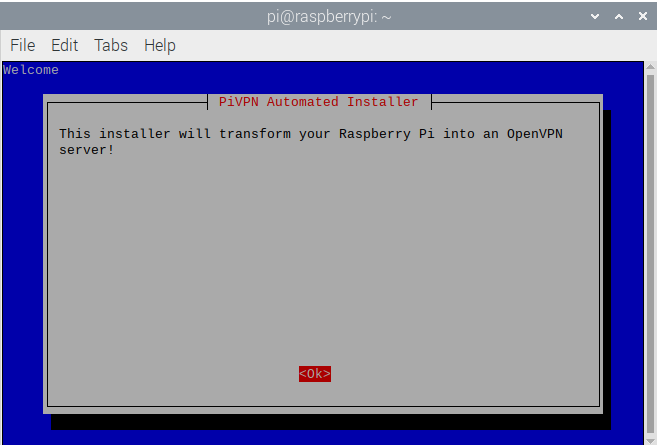
- If you entered the command above the PiVPN Automated Installer modal will appear stating that this installer will turn the RPi into an OpenVPN server. Click
Enter
- The installer will apply a static IP address to the raspberry pi, this is required. As a safeguard, go into your router’s DHCP settings and set your RPi’s IP as static
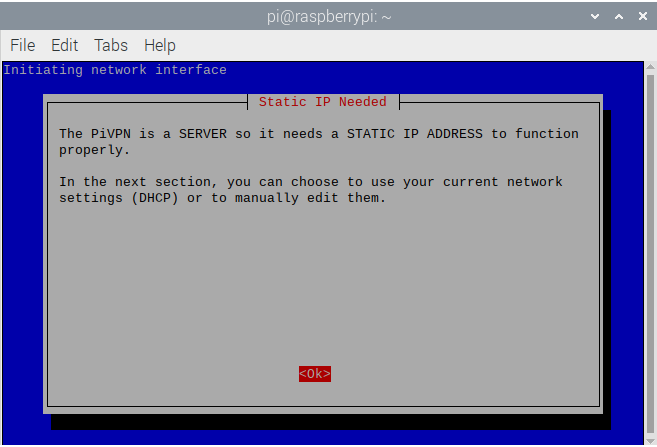
- This shows your RPi’s current IP address and asks if you want to set it as static, hit
Enter

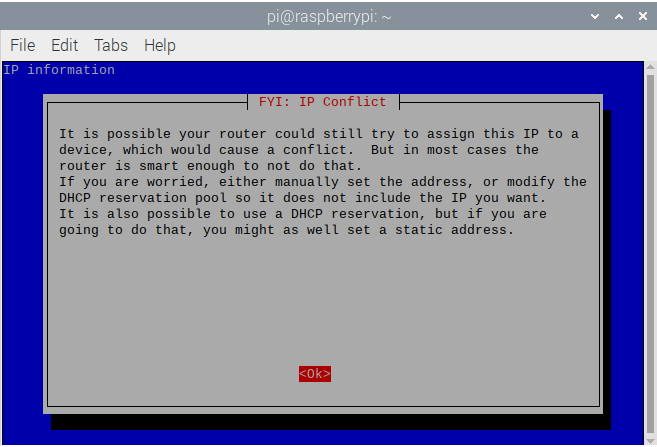
- This is a warning indicating what might happen if you don’t set the RPi’s IP address as static
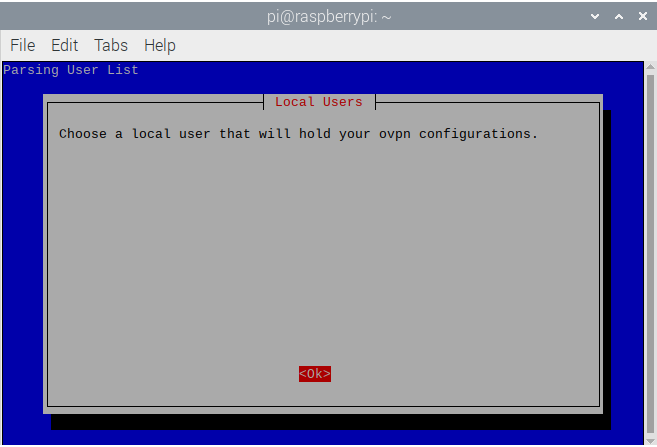
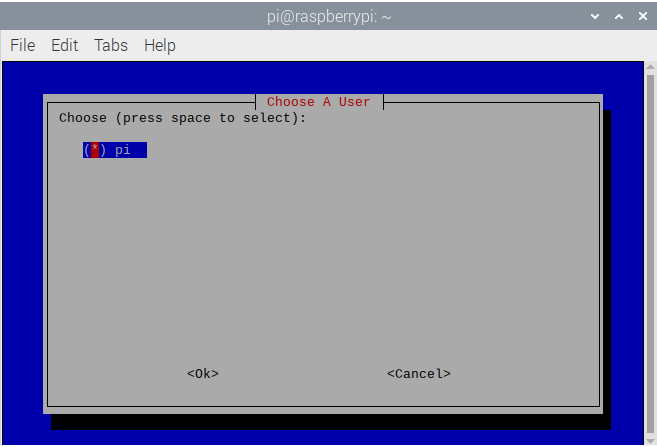
- PiVPN will then ask for a local user to run the ovpn configuration
- My RPi only has one user for this proof of concept so I will select it and press
Enter
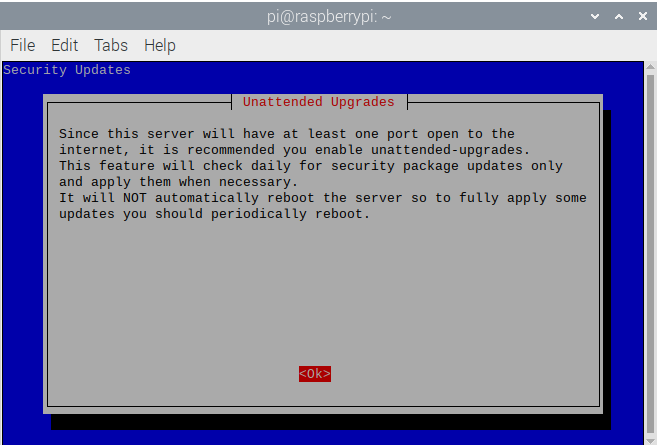
- This modal is important. PiVPN warns about daily updates for the security package updates. Since I am running this RPi headless via SSH, I want me RPi to periodically update, so I recommend this step. Press
Enter, PiVPN can do this for you as well!
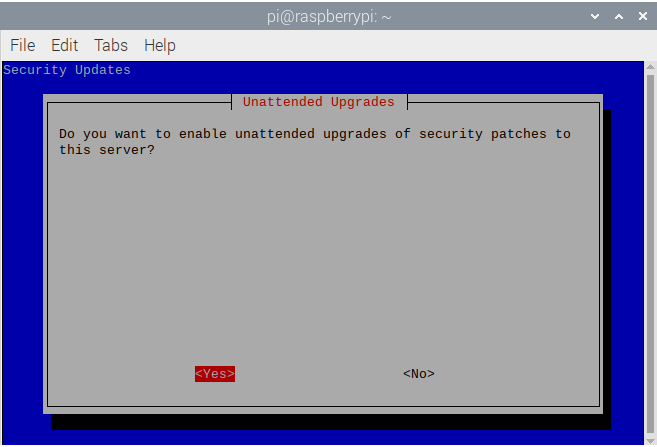
- This is the screen that will ask if you want to enable Unattended Upgrades , select Yes and press
Enter
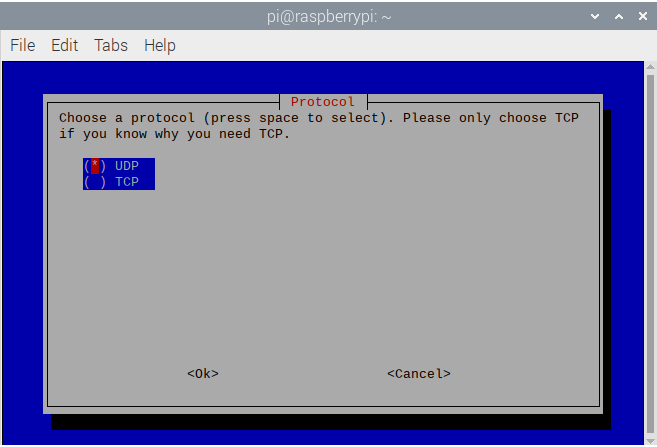
- OpenVPN runs via TCP and UDP ports 1194, but usually UDP port 1194. Stick to just UDP port 1194 and go down to Ok and click
Enter
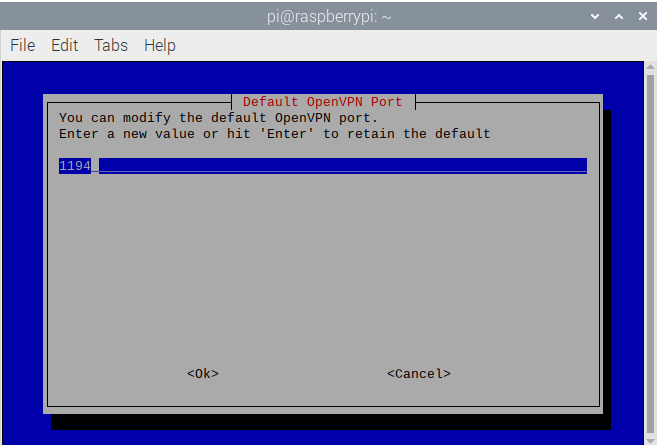
- Don’t change the default port unless there is a specific reason to; hit
Enter
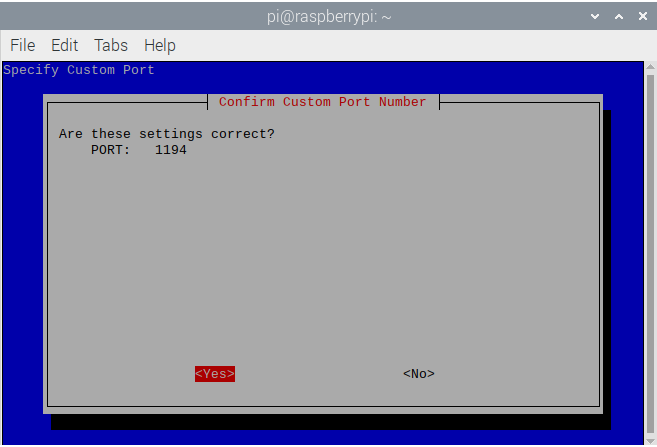
- Confirm these settings and click
Enter
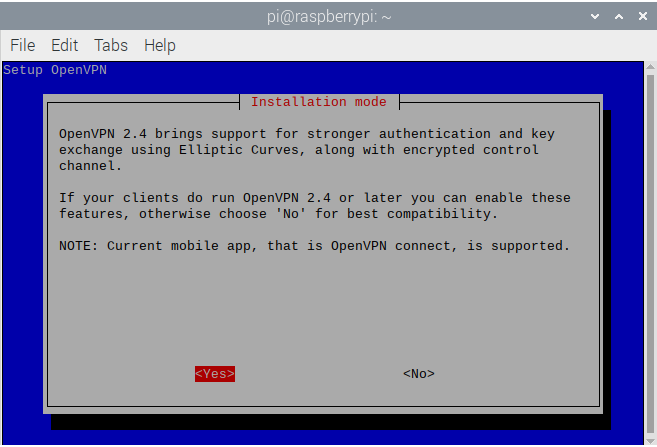
- This next screen is all about OpenVPN version compatibility. For best security, select Yes to run Elliptic Curve key exchange or No to be able to run lower compatible versions. Select Yes in most scenarios
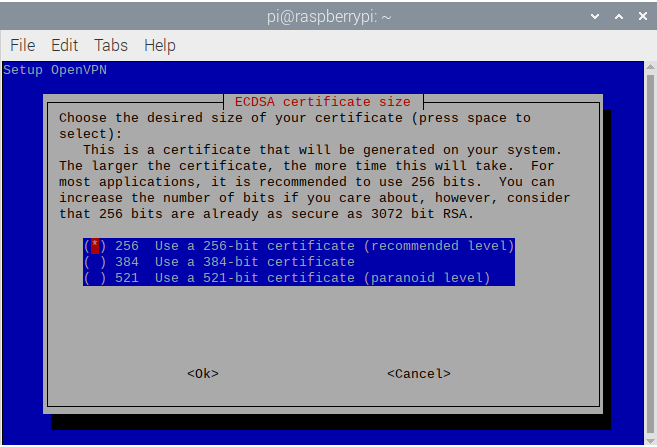
- You should not change the ECDSA certifiate bit encryption size. 256-bit is sufficient as of this writing. Press
Enter
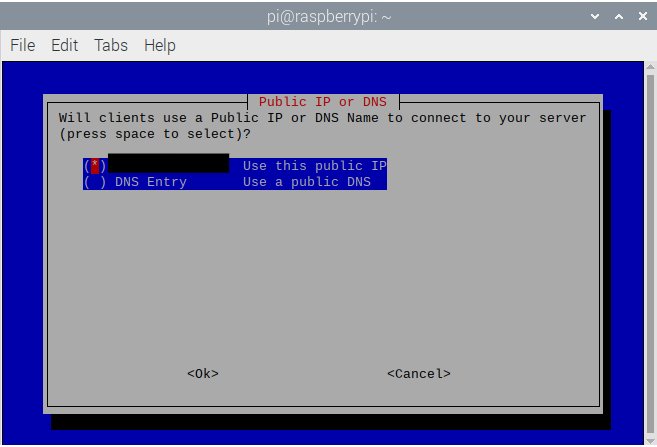
- This screen will show your public IP address and ask to use the public DNS or your public IP. Select your public IP because PI-Hole settings will alter these settings
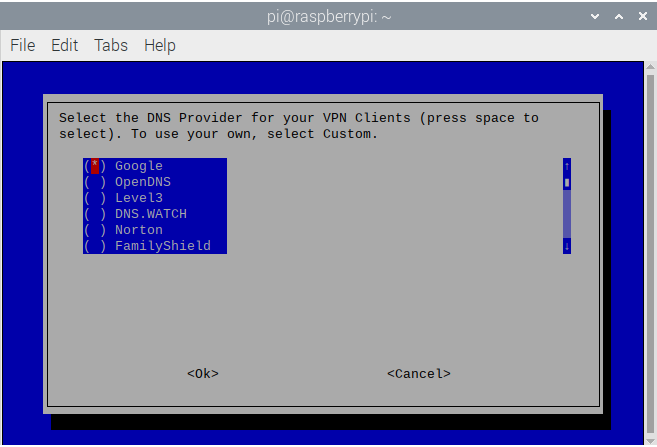
- PiVPN wants to know the public DNS servers to use upstream. Select your preference and hit
Enterwhile selecting Ok. Note: I use DNSWatch
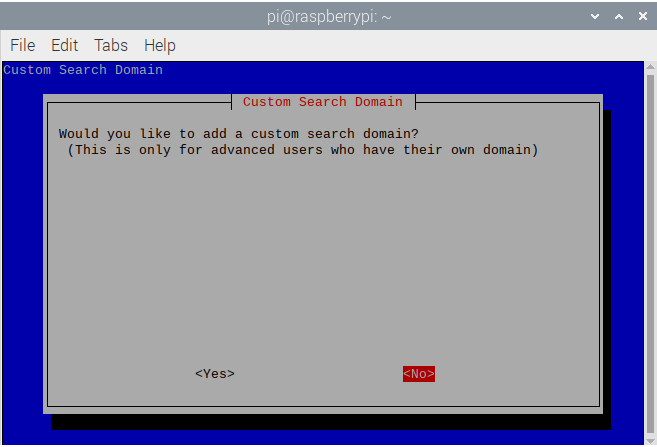
- This is asking to add your own domain. I have none for this purpose so I select No
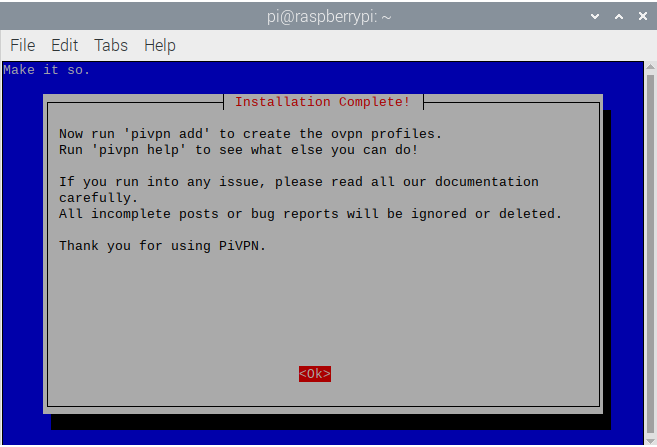
- Then, PiVPN will give a few tips on how to use PiVPN and add ovpn profiles, press
Enter
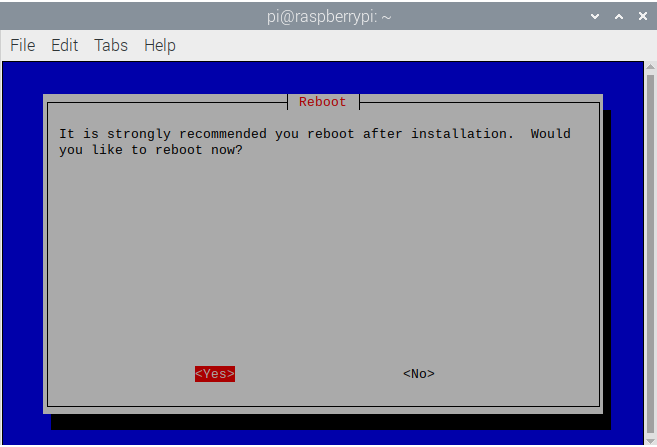
- It will ask to reboot. Select Yes and click
Enter. Your RPi will now be boot and have PiVPN installed!
Pi-Hole Setup
Visual Guide
- Open a Terminal window
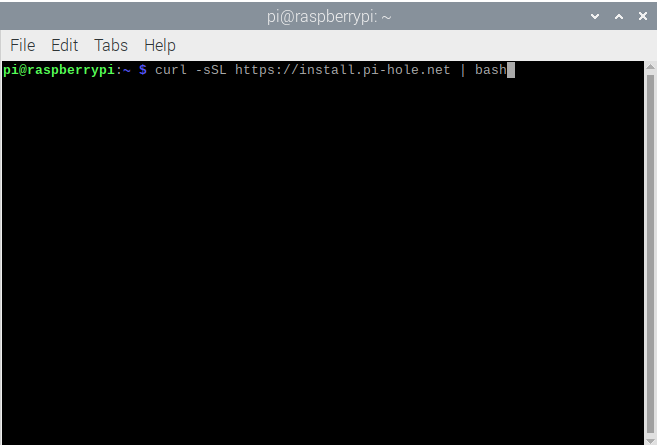
- Enter the following command, per the Pi-Hole website:
curl -sSL https://install.pi-hole.net | bash
Note : Piping to bash (| bash) will run the install automatically. Simply run the command with it to install download and then run (curl -L https://install.pi-hole.net)
- The installer starts with a donation page to support the application and author

- The installer begins

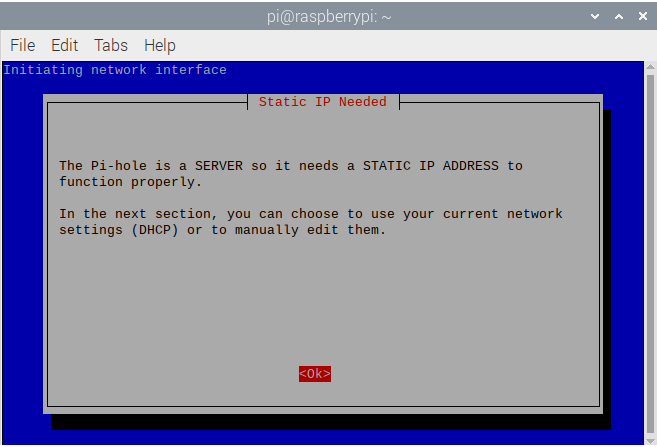
- As stated in the SSH Setup, the PiVPN and Pi-Hole servers need to be set to a static IP to run correctly. The installer will run through this first
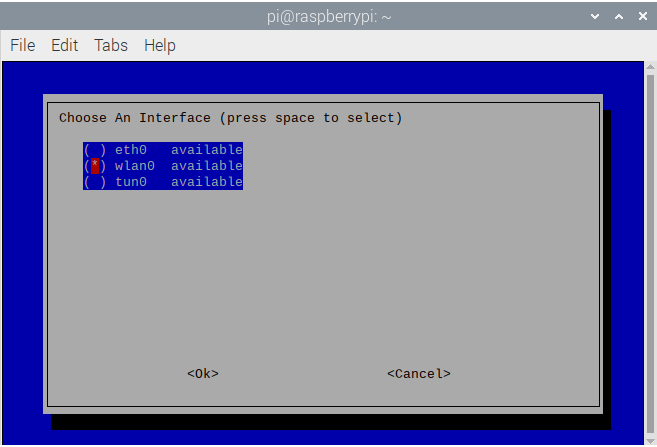
- Select the network interface you want the RPi to run on, if you’re hardwired via Ethernet, you’ll likely select eth0. Mine is on Wi-Fi so I will select wlan0 and click Ok
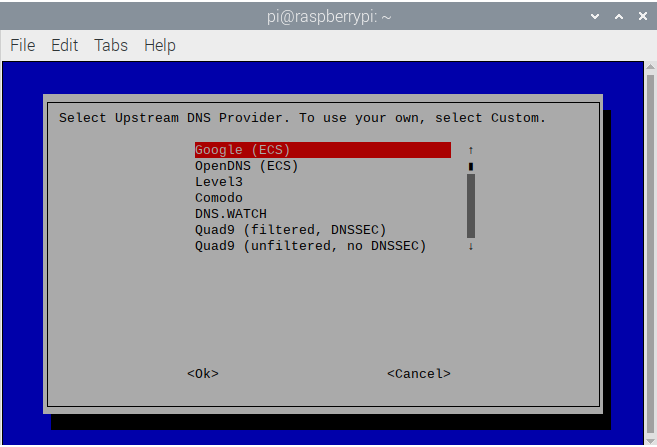
- Select the DNS provider you want to use for upstream DNS queries. I use DNS.WATCH
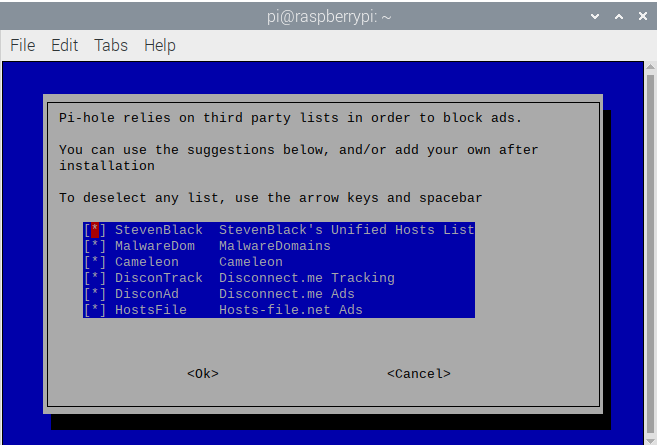
- Pi-Hole uses public domain lists pulled in from various sources in order to block ads and known-bad domains. We will add Phishing Army to this later and you can add and remove them at ease. Leave all of them selected and select Ok
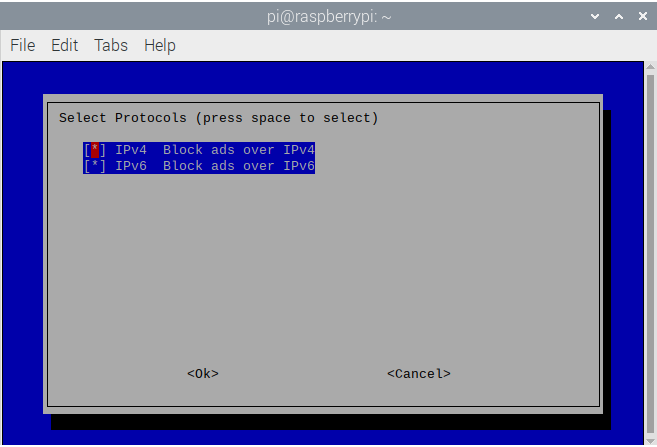
- Then Pi-Hole wants to know whether to use IPv4 or IPv6. You’ll likely want both, leave them selected and click Ok
- The next screen is a warning about IP address conflicts if the RPi is not set to be a static IP, click
Enter

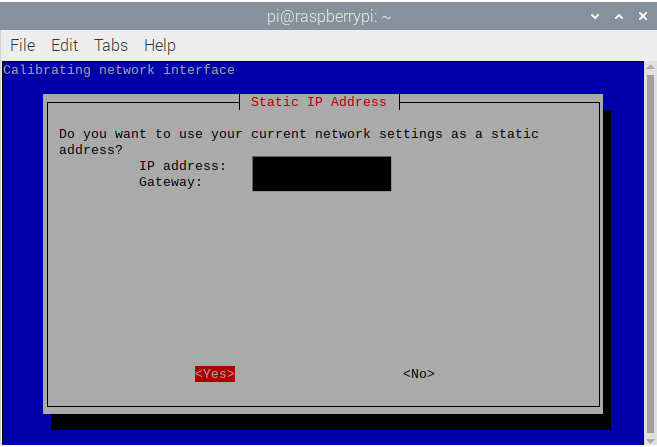
- This is the IPv4 address that Pi-Hole will use as the static IP and the gateway
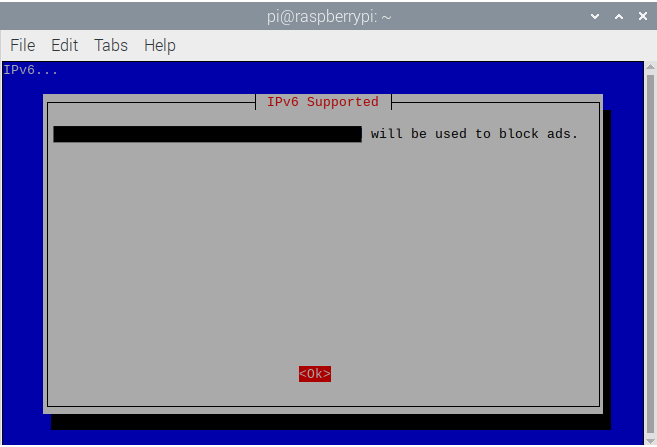
- Then it will show the IPv6 address it is using
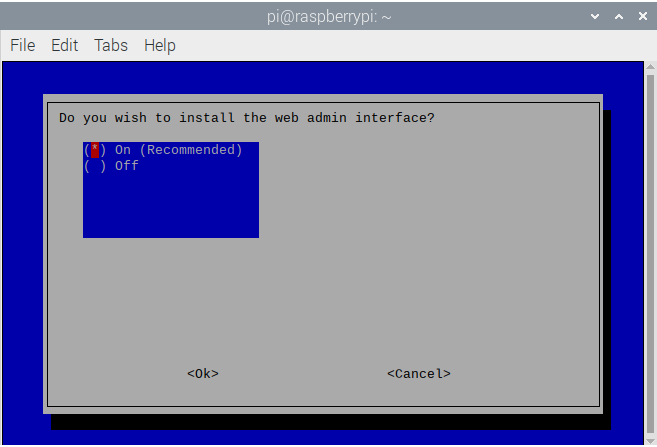
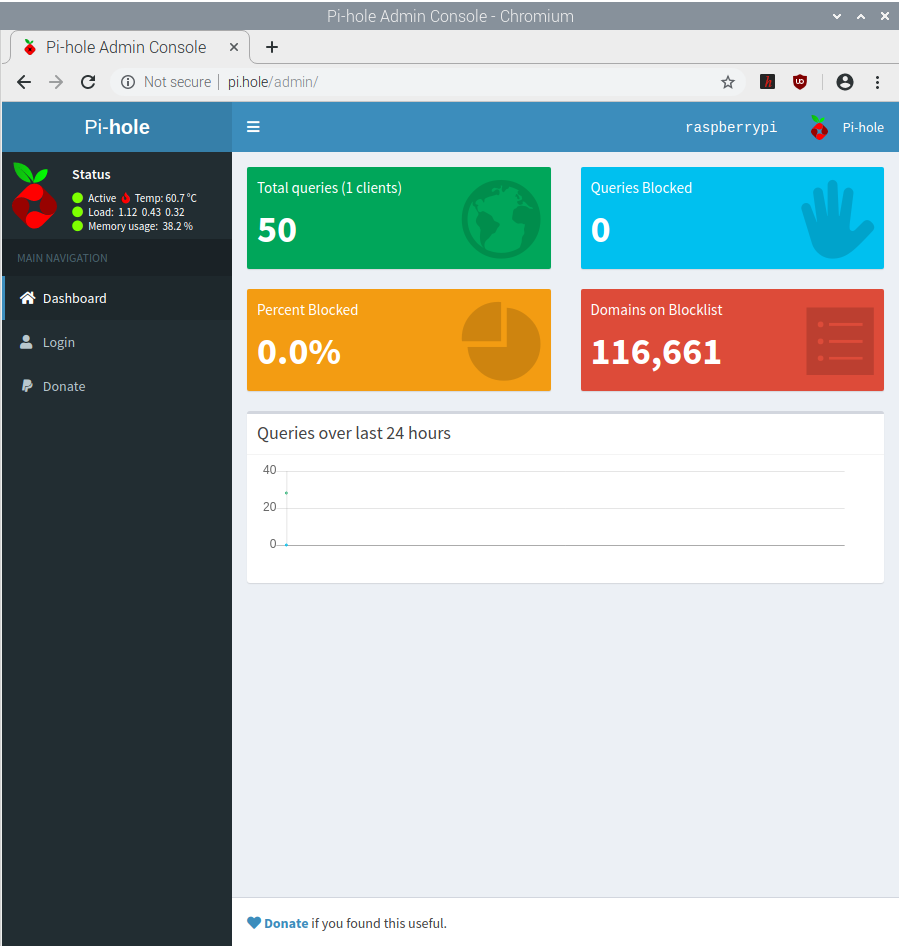
- The web admin interface is extremely useful for analytics on your Pi-Hole, keep this selected to On and continue
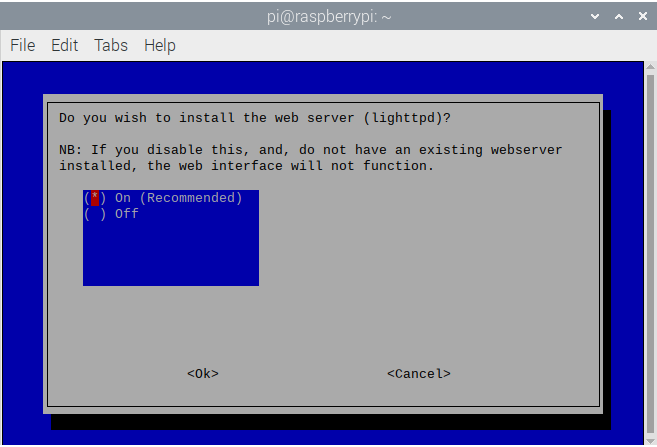
- This step is a precoursor to the next step and only needs to be enabled if you plan to use the web admin interface. If you don’t plan to, select No , however it is recommended that you do so
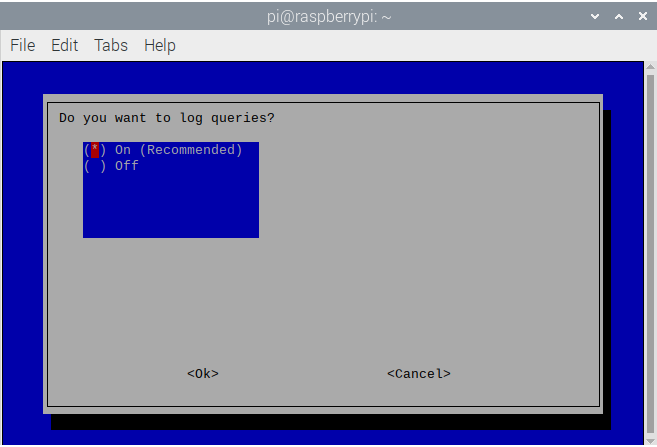
- Again, for security and analytic purposes, keep log queries On
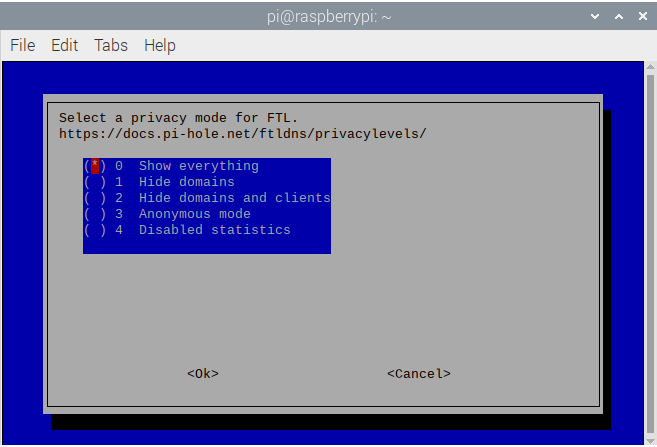
- Pi-Hole uses a 0-4 privacy level ranking system that is used to log specific type of network traffic, information on the privacy levels can be seen here. Select your level and continue.
- The installation is complete from this stage and it will display your information tthat was set throughout the installer
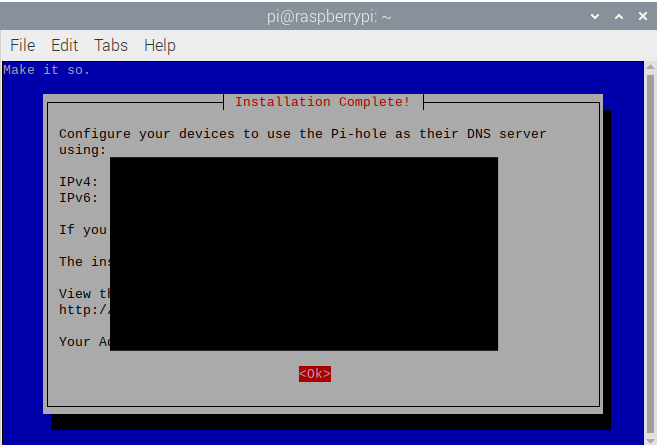
- Navigate to pi.hole/admin to go to the web interface for Pi-Hole. This is only possible if you enabled it in step 13
Pi-Hole Domain Feed Configuration
Adding public lists to Pi-Hole (Phishing Army)
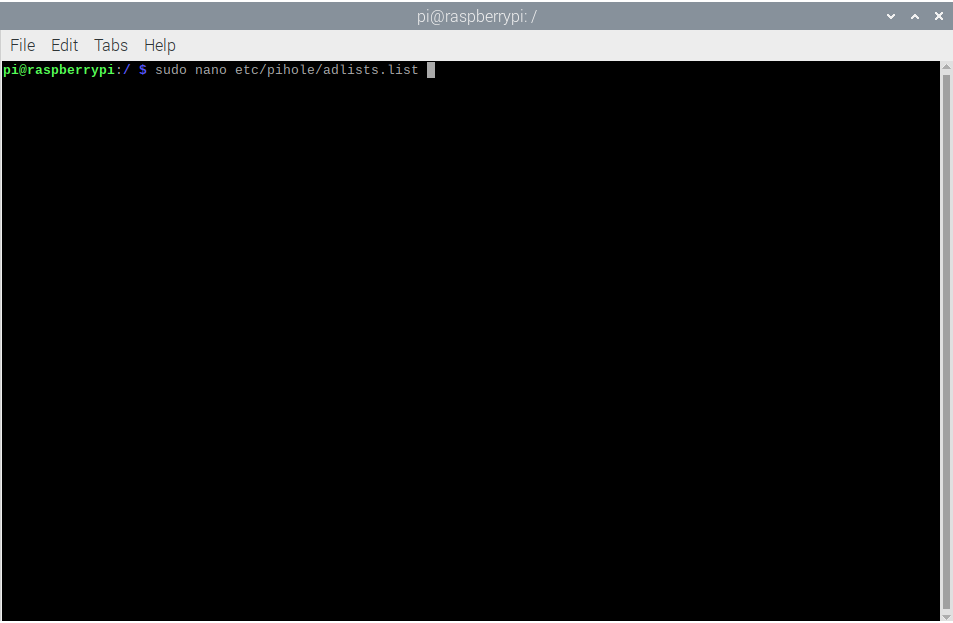
- The file containing the block lists that Pi-Hole pulls from is
adlists.listlocated atetc/pihole/adlists.list. Open that file using your preferred editor
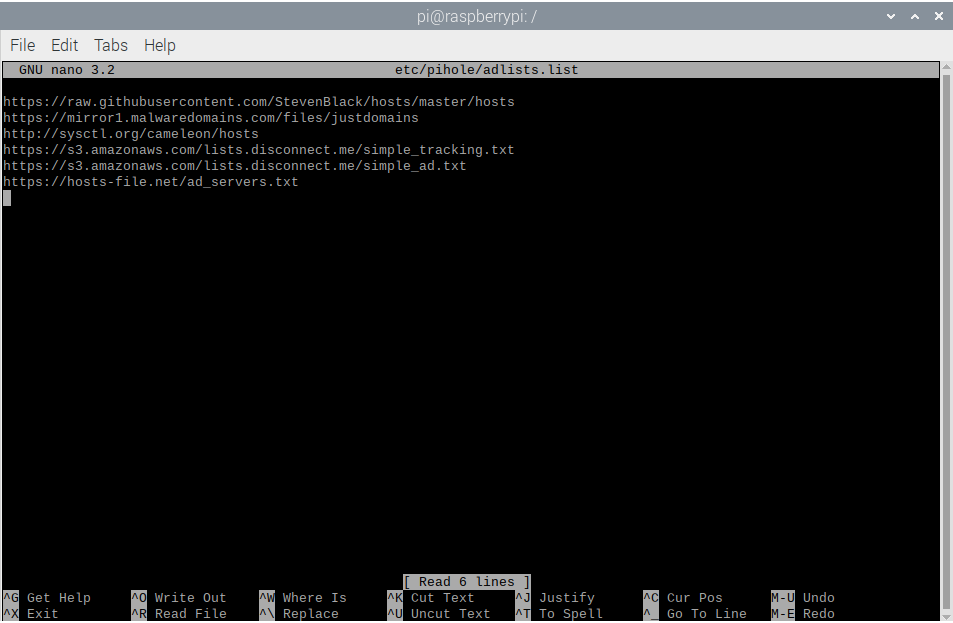
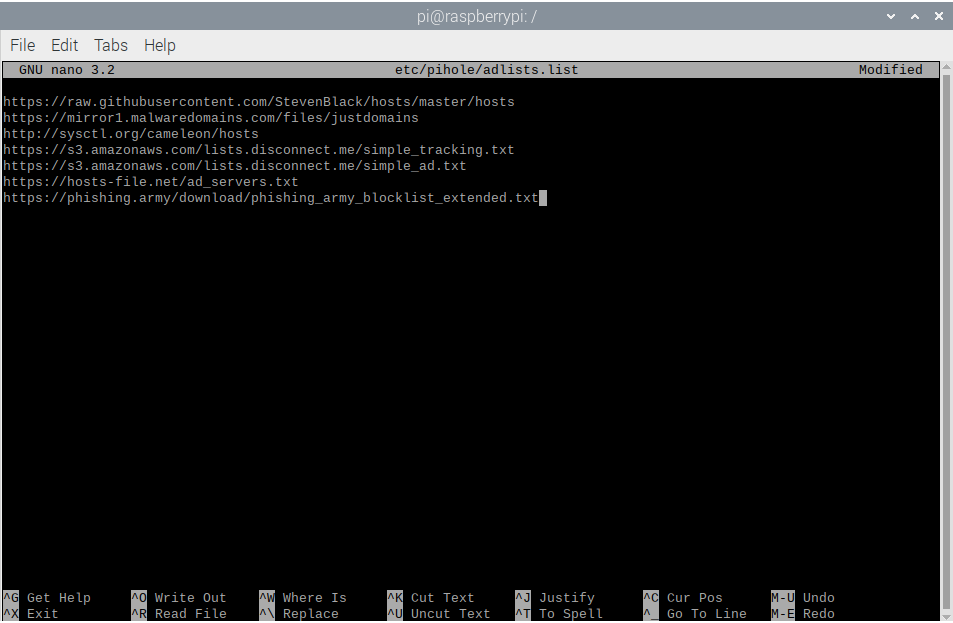
- The list of URLs that contain these third-party lists are revealed. Go to the bottom of the list and add
Phishing Army’s public extended domain list. The list is located at:https://phishing.army/download/phishing_army_blocklist_extended.txt. Save and exit
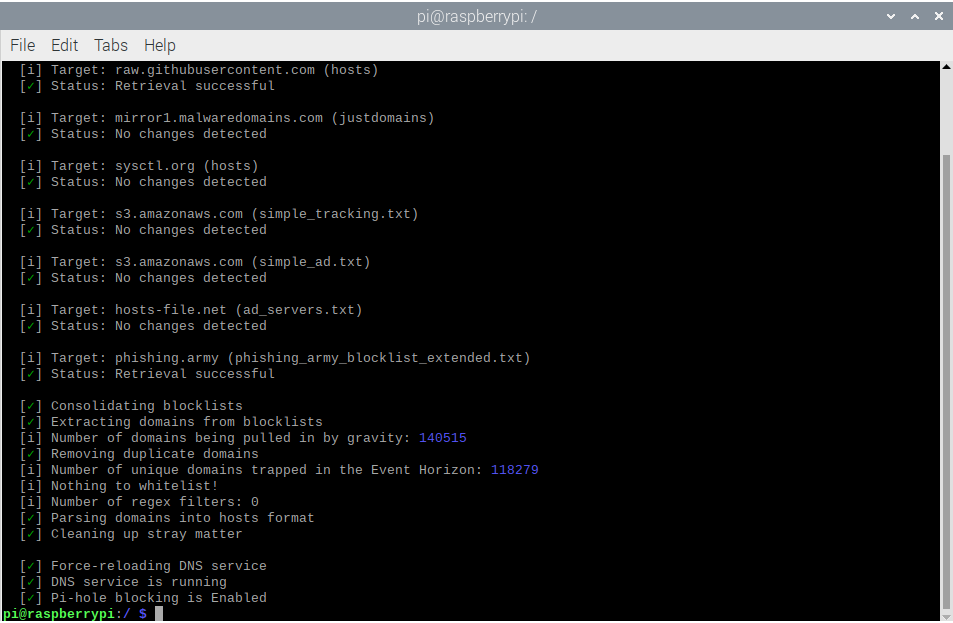
- To manually pull the domain feeds into Pi-Hole, and with Phishing Army freshly added, run the command
pihole -g
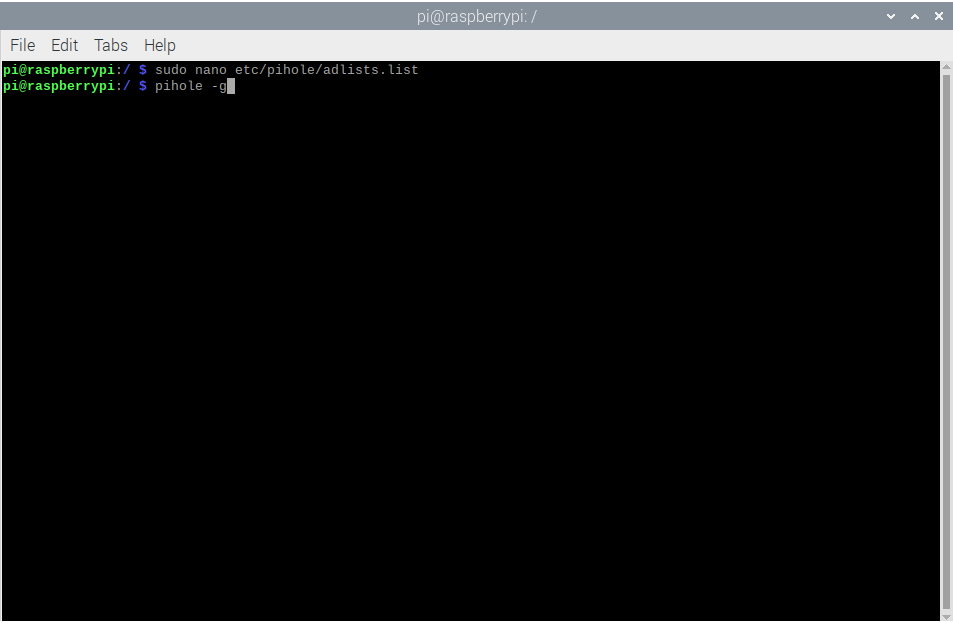
- As you can see above, all of the feeds were pulled in correctly and Phishing Army was as well
Pi-Hole Cron Job Change (Weekly to Daily)
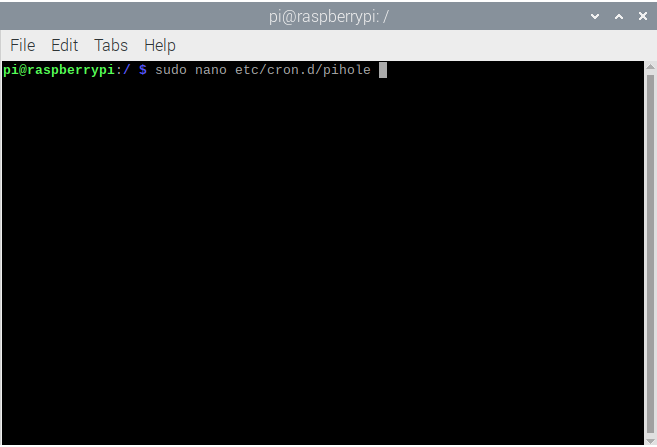
- Using your favorite editor, open the pihole cron job file at
etc/cron.d/pihole
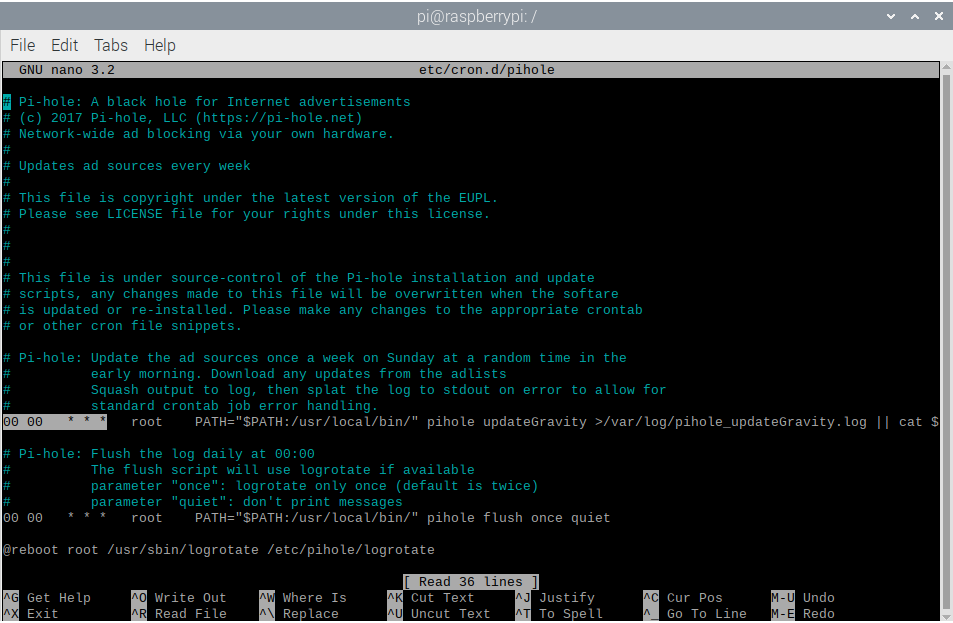
- The cron job that updates the Pi-Hole feeds weekly is highlighted AND ALREADY CHANGED TO THE CORRECT SETTING TO UPDATE NIGHTLY AT MIDNIGHT. Change this cron job to update whenver you please, a cron job calculator is here
Thank You!
I hope this helped solve some issues you were having with setting up SSH, PiVPN, Pi-Hole, and adding lists to Pi-Hole. If you have any questions Contact me via email with any concerns.