Introduction
This post will cover how to set up a virtual machine from scratch on Windows 10 using VirtualBox ONLY. This post will NOT cover VMWare Workstation Player because the process is very similar to VirtualBox. This post will also NOT cover how to set up a virtual machine using Hyper-V due to the fact that Hyper-V requires Windows 10 Enterprise, Pro, or Education. Most readers of this post will likely have Windows 10 Home which doesn’t allow virtualization. As an example, I will visually walk through how to set up the following operating systems on VirtualBox:
- Kali Linux
-
Windows 10 In case you are completely unaware or need a refresher on virtualization or virtual machines, here is a few good resources for a high-level overview (Links to external websites):
- Red Hat: What is Virtualization
- VMWare Virtualization Essentials Whitepaper
- IBM Cloud Education: Virtualization A Complete Guide
VirtualBox also has an online guide on basic virtualization concepts and installation guides, which was used as one of the references for this post:
Oracle VM VirtualBox User Manual
Disclaimer: This post is meant for educational purposes only and any information obtained sholuld not be used for malicious purposes. I will not be responsible for any damage, harm, or legal action derived from any information within this post.
Table of Contents
VirtualBox Installation
There’s not much to this section, just install the latest version of VirtualBox and walk through the simple installation prompts to have VirtualBox up and running.
_The version used in this post is VirtualBox 6.1.8 _
You can install the latest version of VirtualBox here:
https://www.virtualbox.org/wiki/Downloads
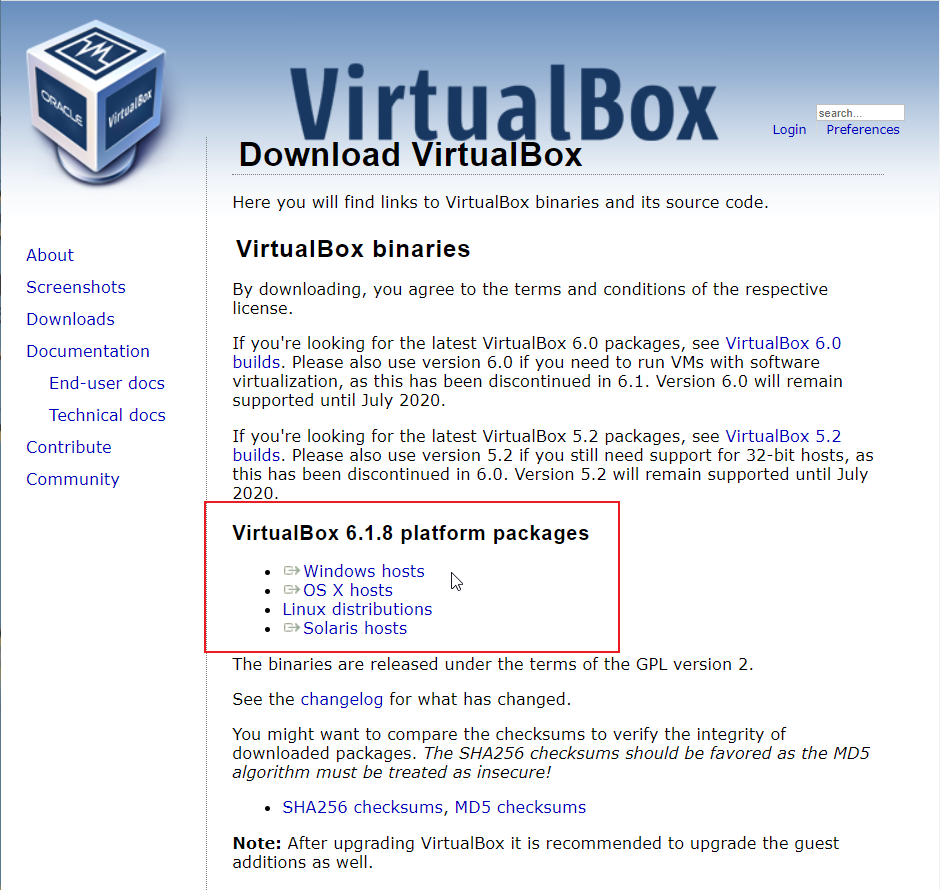
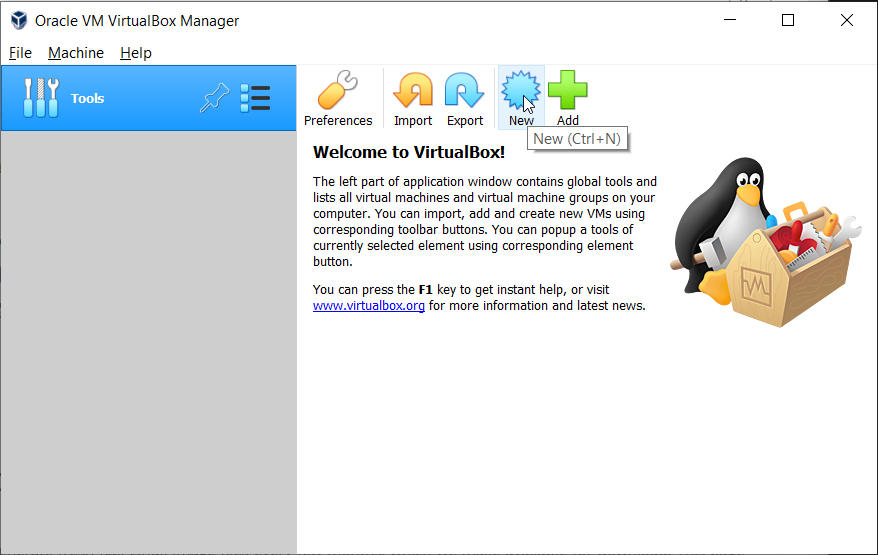
Since I am running Windows 10, I will choose Windows hosts. Once, you have Virtualbox up and running, you can move on to install the operating system of your choosing. I would highly recommend becoming familiar with th interface and read the Virtualbox manual if you have not used VirtualBox before. You should see this window before proceeding:
ISO vs OVA vs OVF
The first step towards getting any virtual appliance set up is to download the disc image file (.iso) or virtual format file (.ova/.ovf). You can think of an .iso file as an image of the operating system that you must cuztomize to get set up in VirtualBox. A .ova or .ovf file will have an image of the operating system and preconfigurations established. You can think of it as a pre-installed environment that you can just import. Here are a few elevator pitches of what these file extensions are, and are for:
Note: If you have little knowledge of what you are doing, I recommend, if you have the option, to default to importing .ova and .ovf virtual appliances.
Kali Linux
Kali Linux (previously BackTrack Linux) is a debian-based Linux distro most notorious for being used with penetration testers because of the penetration testing tools built right in. It comes in several formats and filetypes. First off, Kali Linux comes in the Installer, Live, and NetInstaller formats for ISOs. We are using the Installer format. You should only use Live for Kali Linux running from a disc or USB drive. NetInstaller is for Android devices. Kali Linux also has .ova files for VirtualBox images as well so you can easily import it.
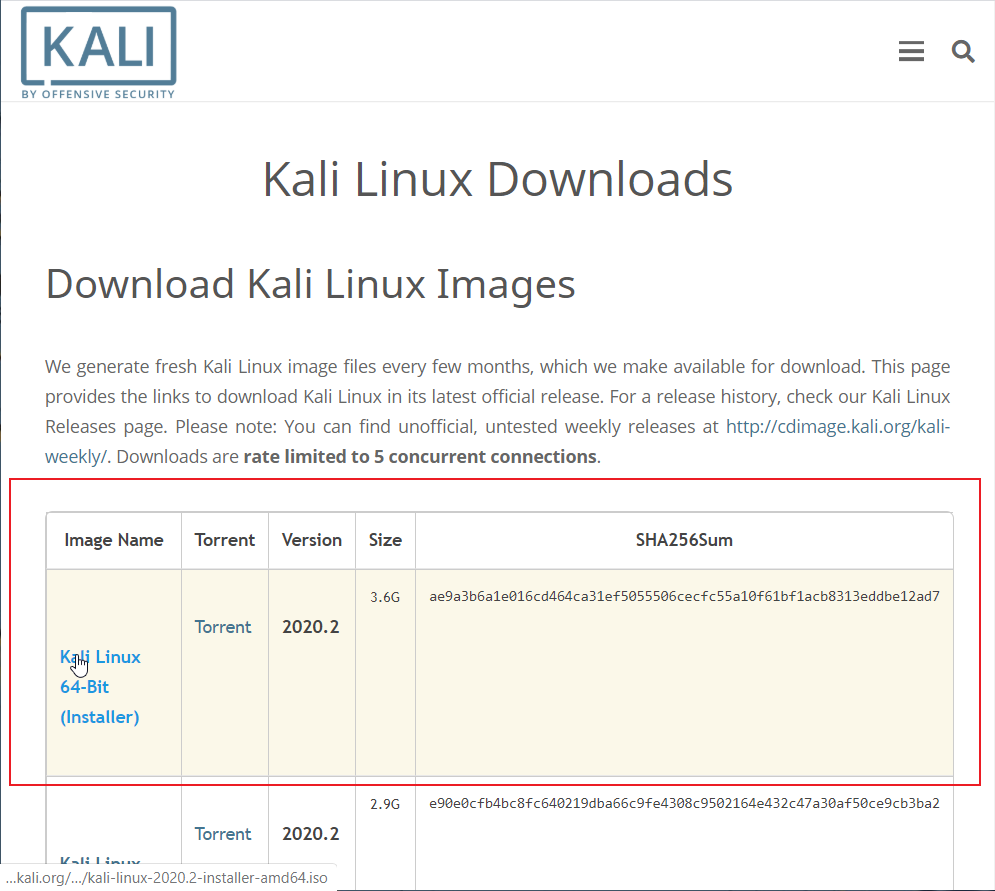
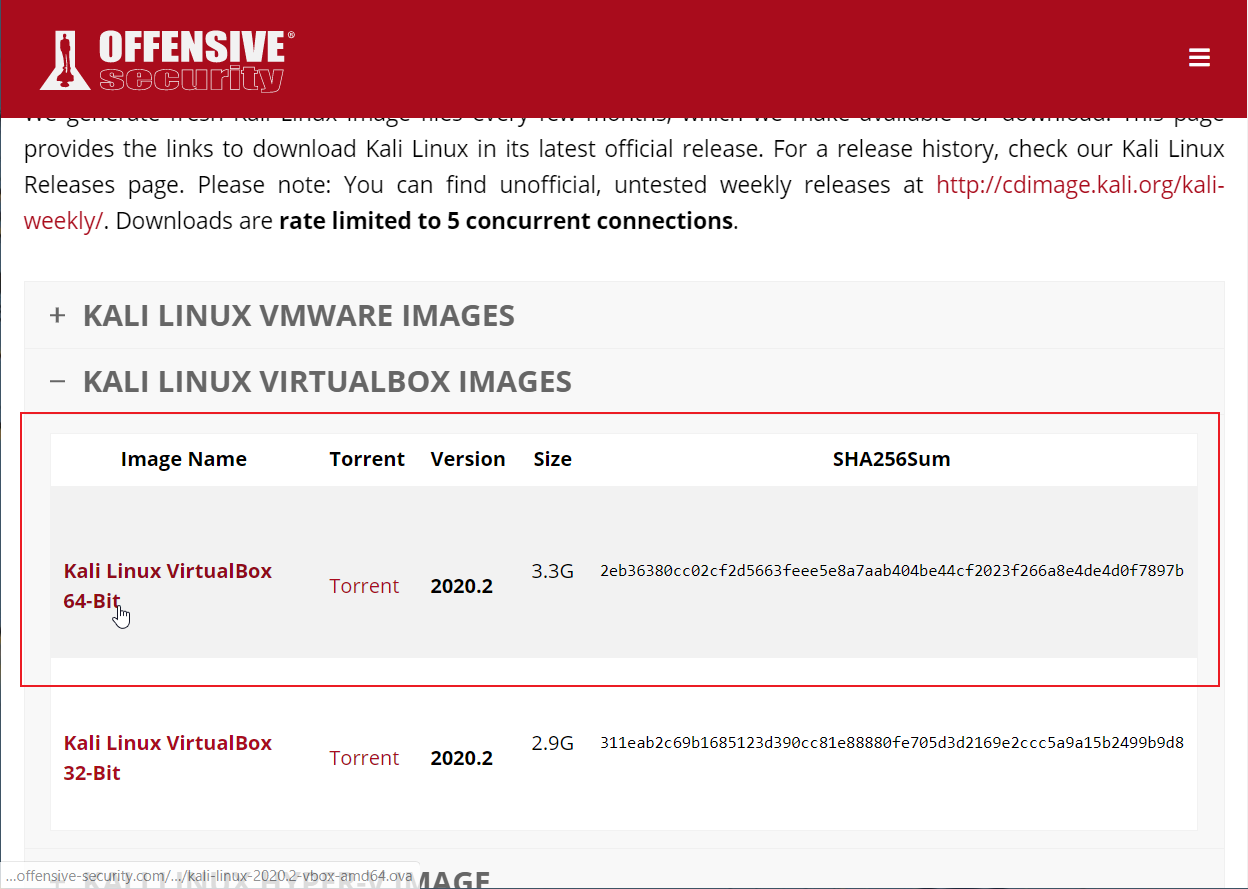
- The current version of Kali Linux as of this writing is 2020.2.
- I am using the 64-bit versions of Kali Linux. Choose either the 32-bit or 64-bit, whichever is appropriate and most feasible for your machine.
Kali Linux Virtual Machine Minimum Recommended Hardware Requirements :
- 2 CPU cores
- 2GB RAM
- 20GB of extra storage space
ISO or OVA
ISO
You can download the Kali Linux .iso images here:
https://www.kali.org/downloads/
Once you have VirtualBox and the ISO installed, follow these steps:
- Open VirtualBox Manager and click on the New button to create a new virtual machine
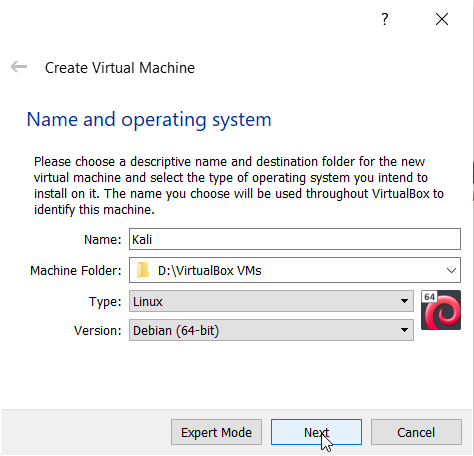
- Alter the following fields and then click Next :
- Name : The name of your virtual machine. (I named mine Kali)
- Machine Folder : The folder where you want to store the virtual machine files. Select an easy-to-find folder for all of your machines
- Type : This is a Linux operating system so select Linux
- Version : Kali is based on the Debian kernel, so select Debian and your appropriate bit version.
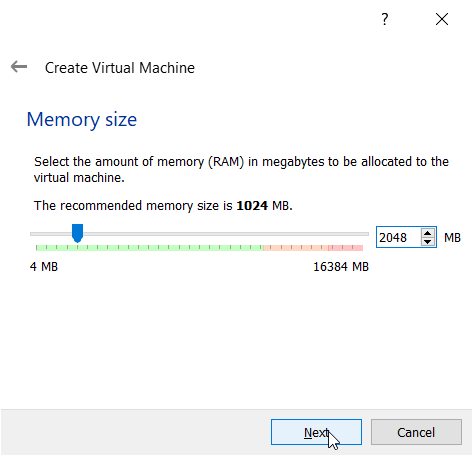
- Kali Linux recommends a minimum of 2GB of RAM for optimal performance, change the RAM to 2048 MB (2 GB).
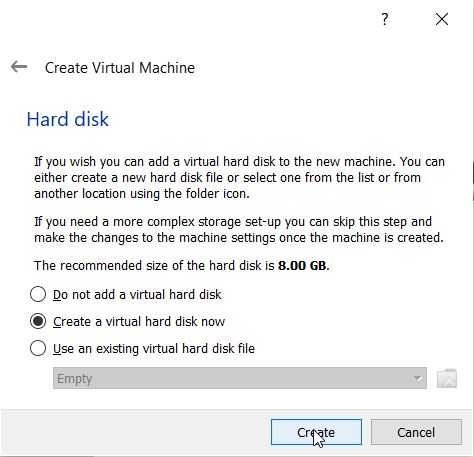
- This step in the process is for virtual machine hard disk creation. Don’t change anything (Create a virtual hard disk now) and click Create
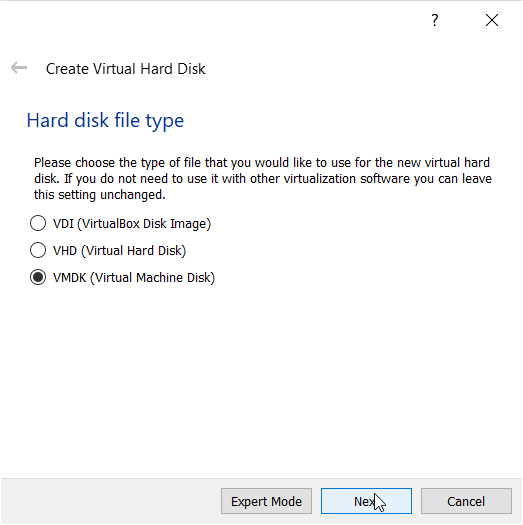
- When you create a new virtual hard disk it will ask you what type you want - VDI, VHD, or VMDK. I won’t go over the differences, but if you want a little overview here is information from the VirtualBox manual on the matter (I use VMDK):
https://www.virtualbox.org/manual/ch05.html#vdidetails
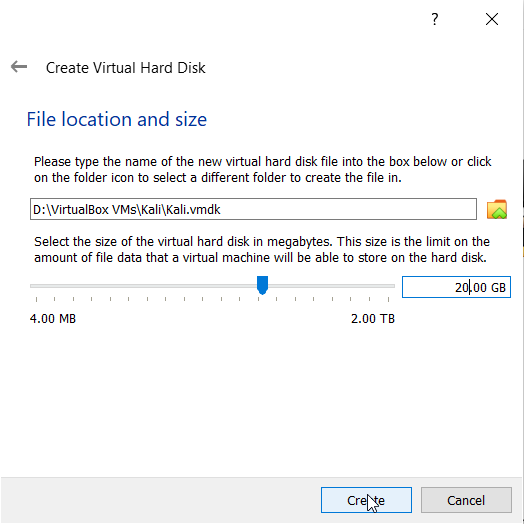
- This step pertains to how data is stored from the virtual machine, whether it is dynamically created or to statically allocate it beforehand and store data as necessary. There is now an option to partition storage into less than 2GB chunks as well. The most popular and recommended action is to select Dynamically allocated (don’t change anything) and click Next.

- The final step in the inital setup process is to allocate hard drive space for storage from the virtual machine. Kali Linux recommended 20GB so thats what I will begin with. Click Create.
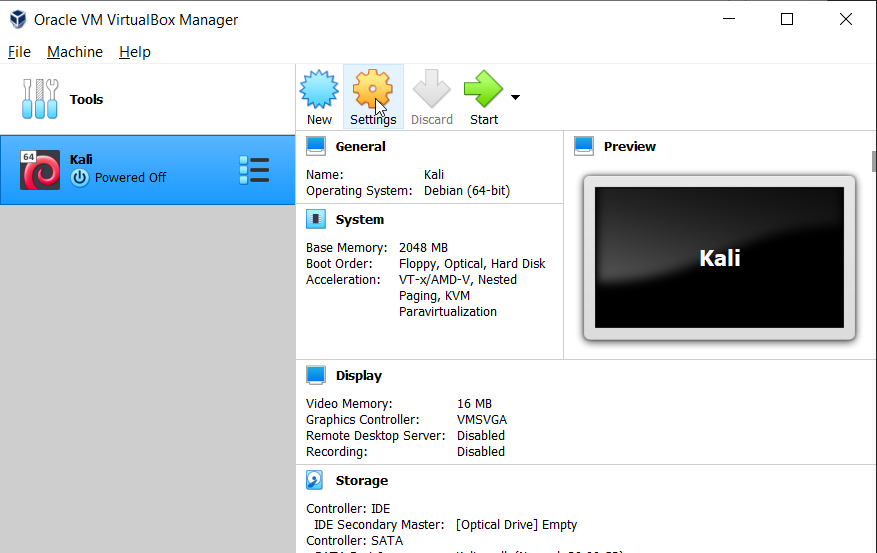
- Once the machine is created you will now have a vanilla Debian Linux operating system, but it is not yet Kali Linux. You need to add the ISO file as a boot option. Click Settings when your virtual machine is selected onthe left.
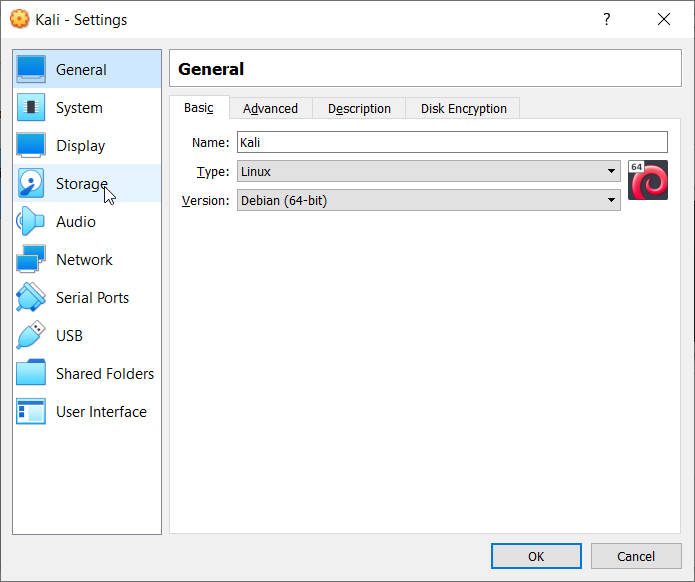
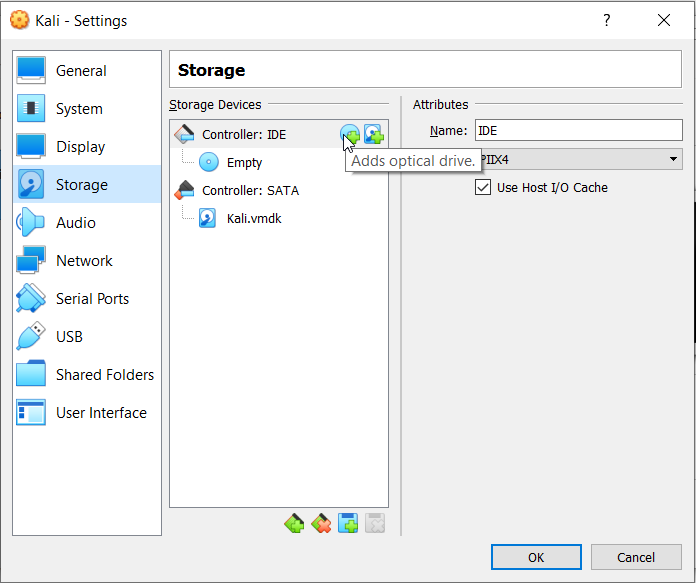
- Then, click Storage on the left-hand side column.
- Click on the small icon next to Controller: IDE that looks like a disk with a green plus sign (Adds optical drive).
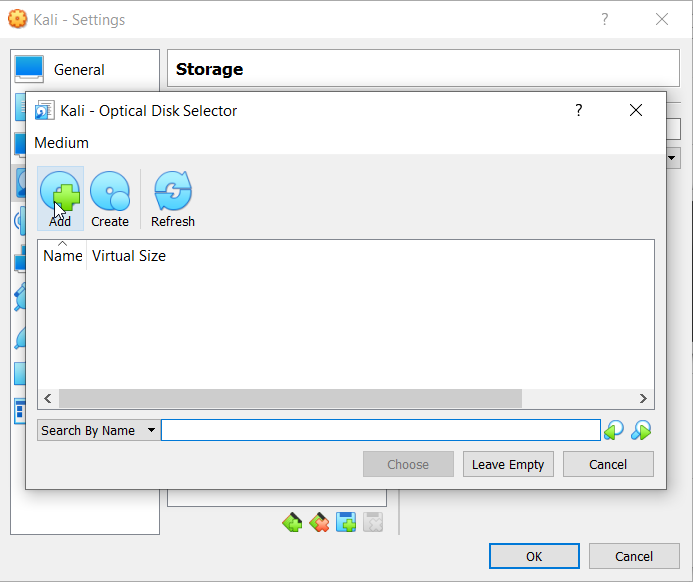
- Click on the Add button and the directory to your local machine will appear. Find the Kali Linux iso you downloaded prior to this.
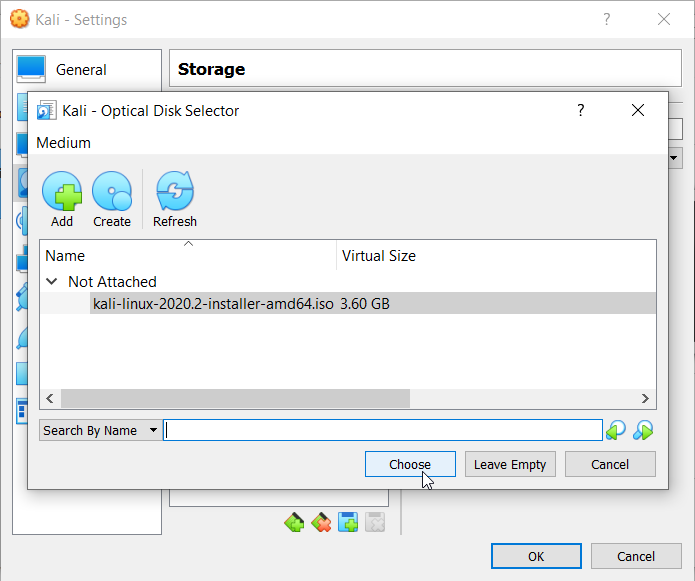
- Once you have found the file, click Choose.
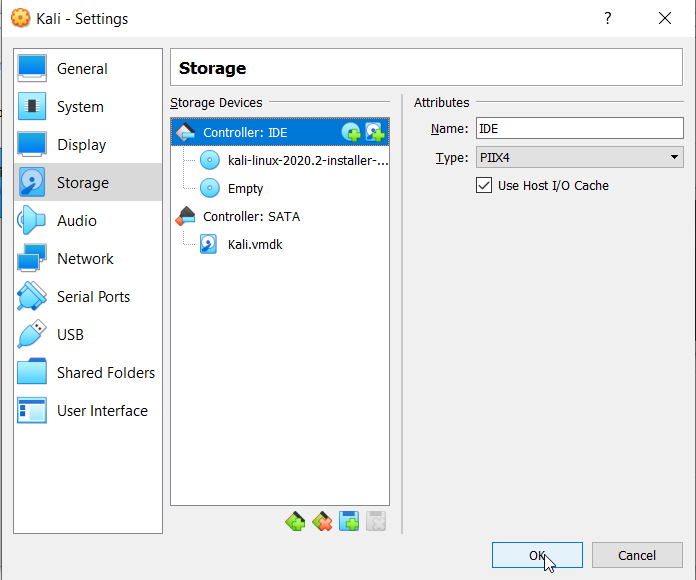
- You should see an entry under the Controller: IDE Storage Device. Click OK.
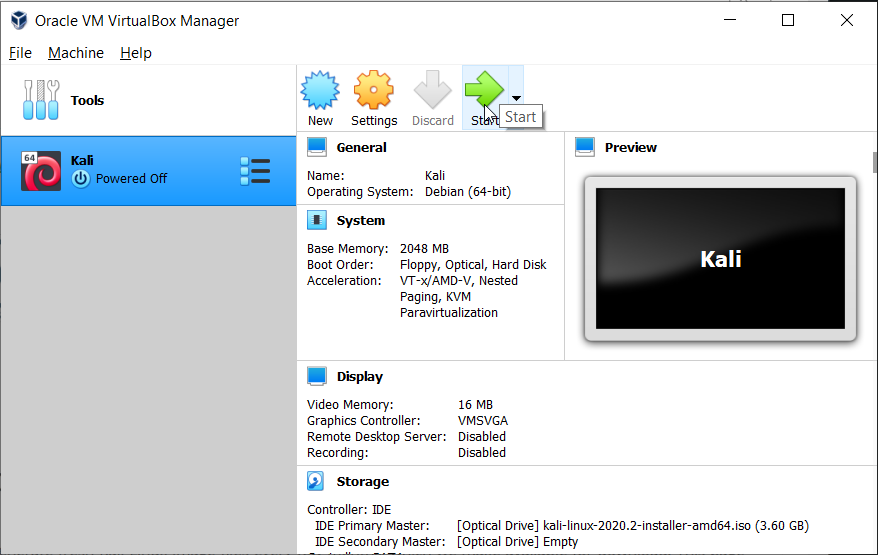
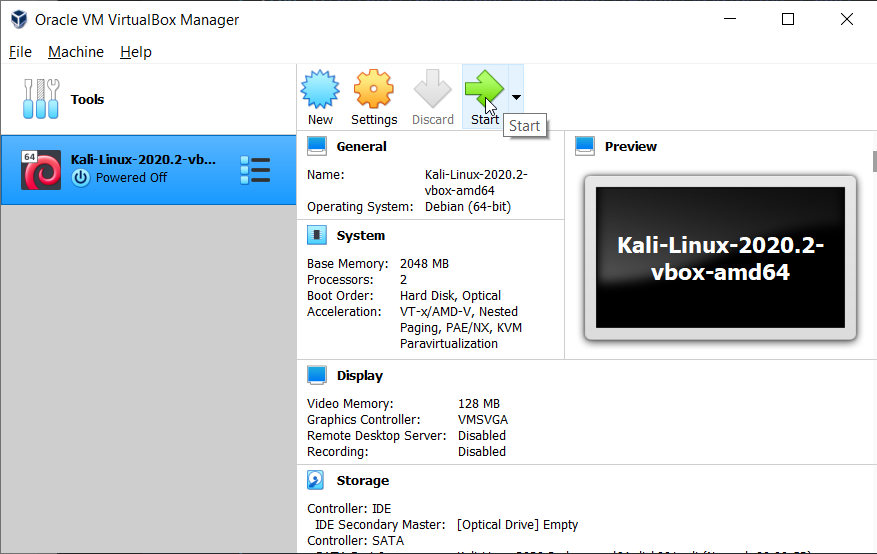
- At this point the virtual machine is completely set up. You will have to run the first time installer. Click Start.
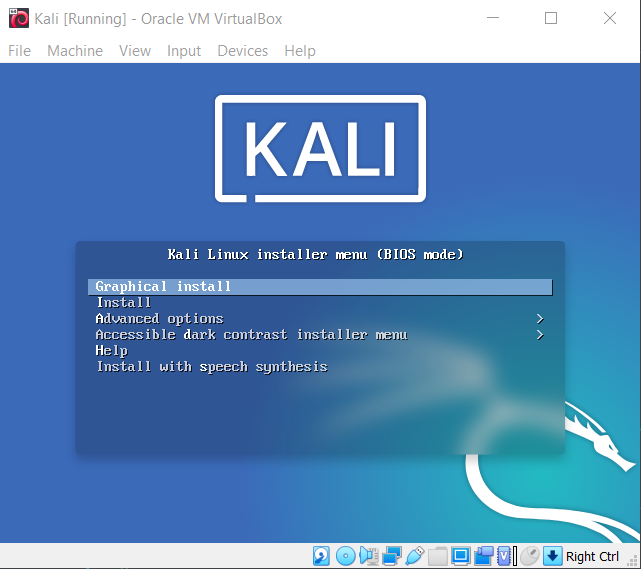
- Select Graphic Install or whichever install option you prefer. Then walk through all of the set up prompts until you are met with the desktop. If you are unsure of an answer, the likely thing you should do is to just leave it blank and continue, where applicable.
The default username and password is: root:toor
OVA
You can download the Kali Linux .ova images here:
https://www.offensive-security.com/kali-linux-vm-vmware-virtualbox-image-download/
This step requires you to install the VirtualBox Extension Pack, which is recommended for the ISO version as well. Download it, run it, and follow the quick installation prompts. You can install the extension pack here:
https://www.virtualbox.org/wiki/Downloads
Once you have VirtualBox and the ISO installed, follow these steps:
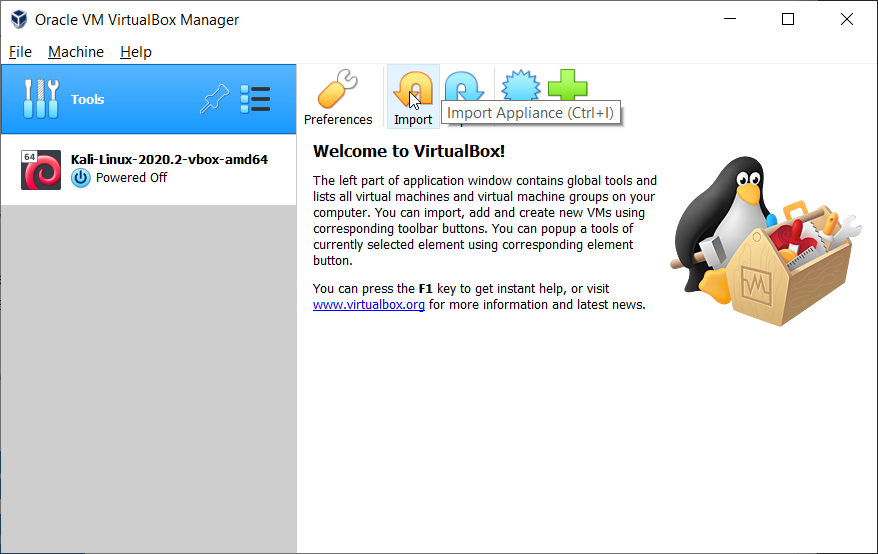
- Open VirtualBox Manager and click on the Import button to import a new virtual machine.
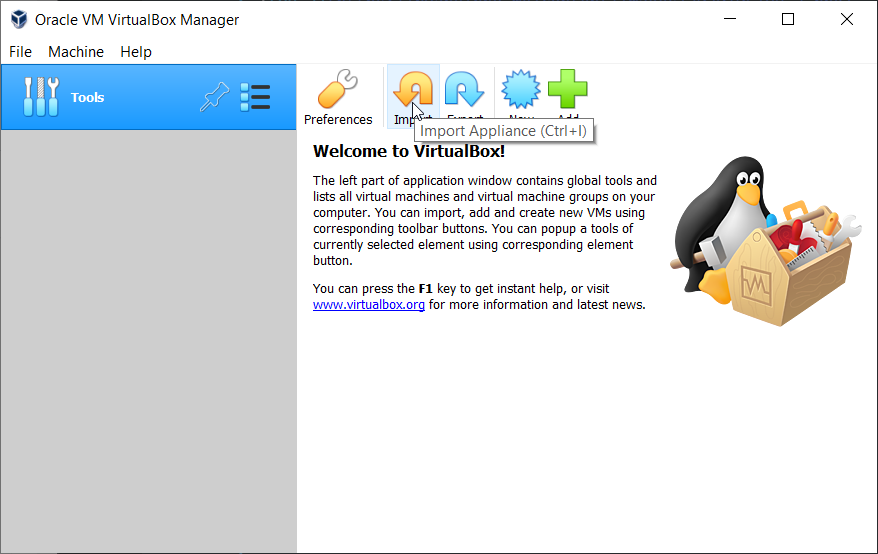
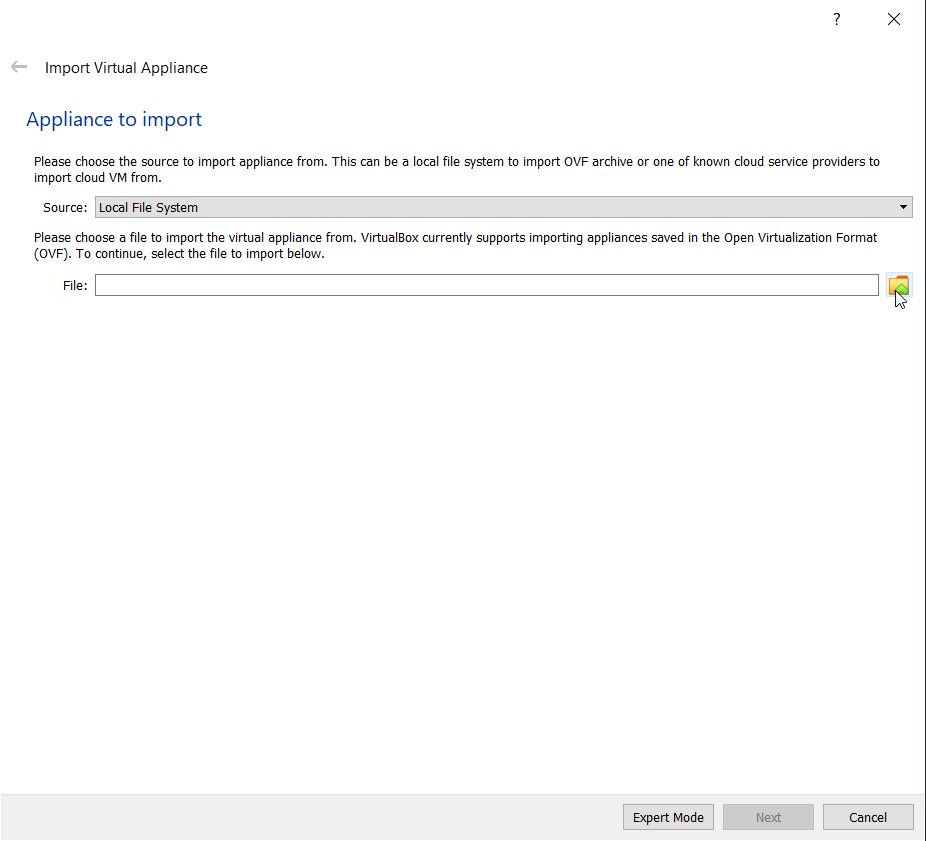
- Click the small folder with a green arrow icon to select a virtual appliance to import.
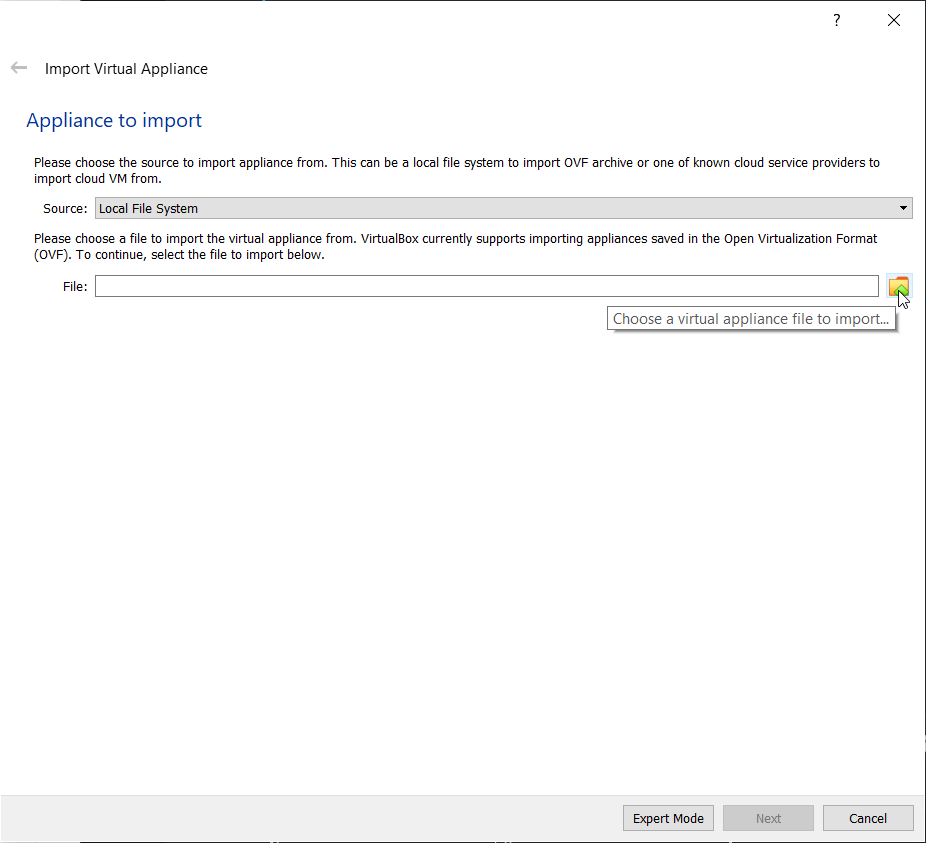
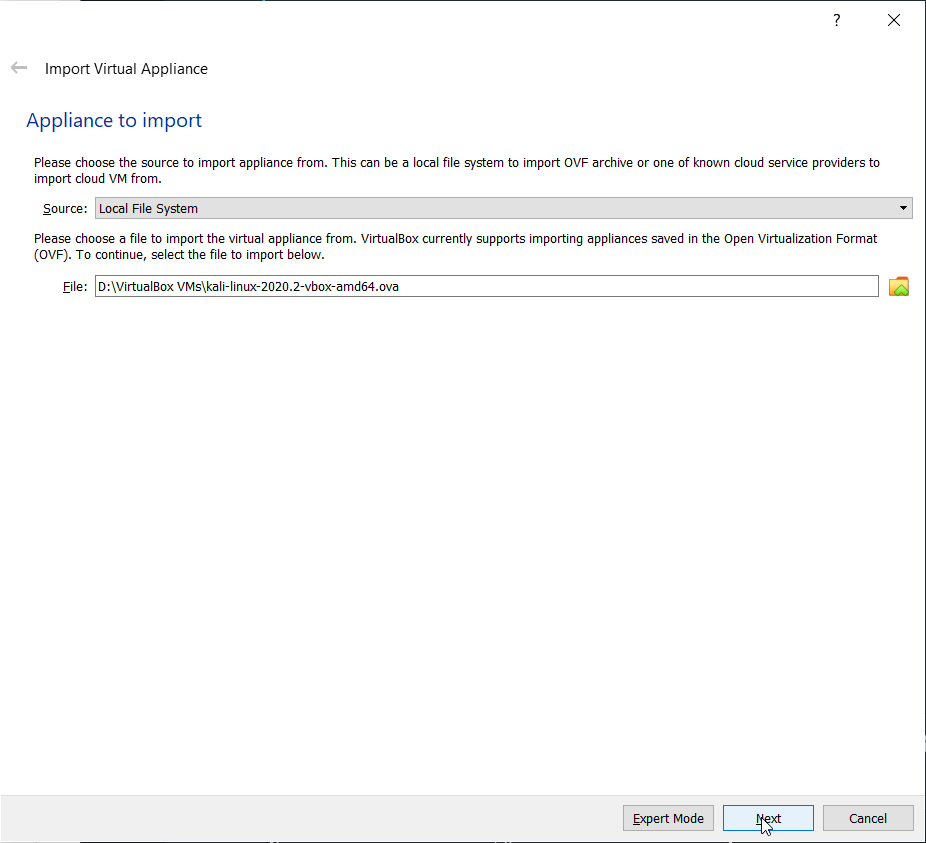
- Find your .ova Kali Linux file that you downloaded prior, then select Next.
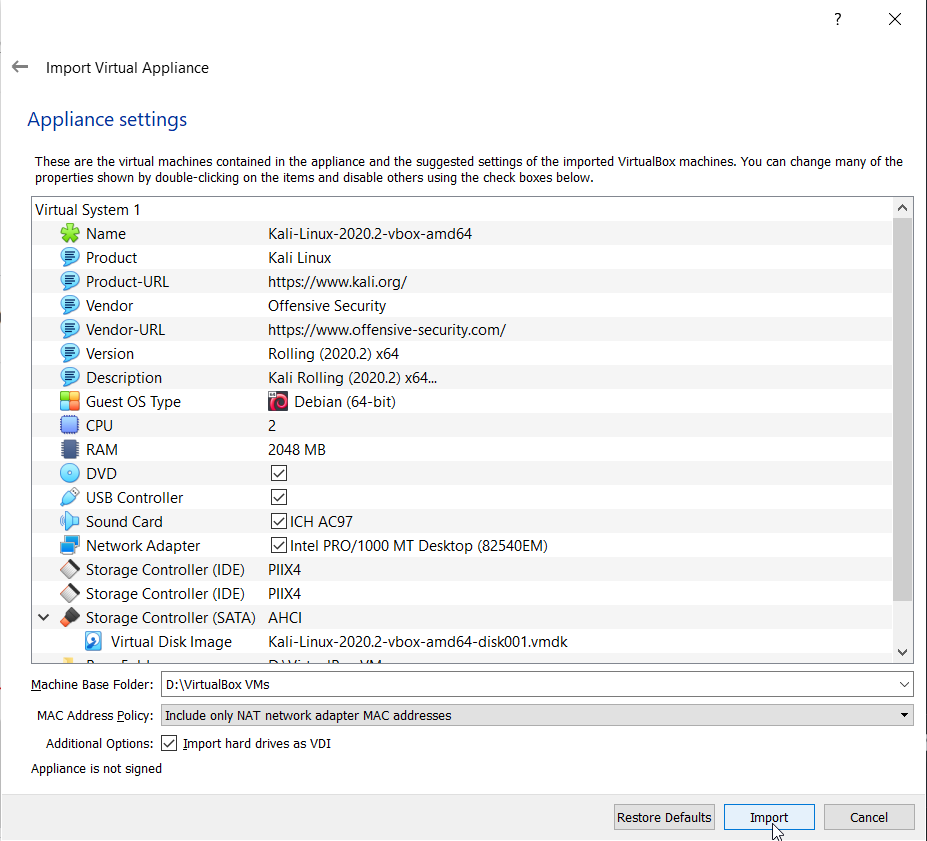
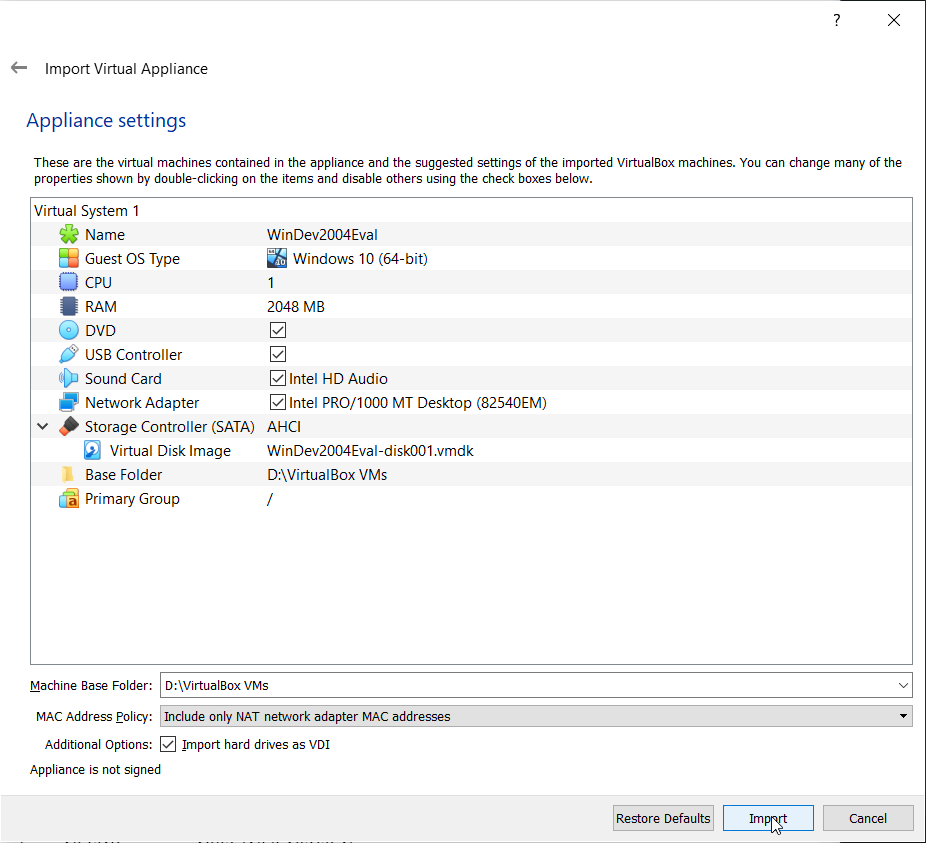
- The next screen shows a summary of all of the specifications defined by your system and the .ova file definitions. Make sure everything is correct (including the Machine Base Folder) and click Import.
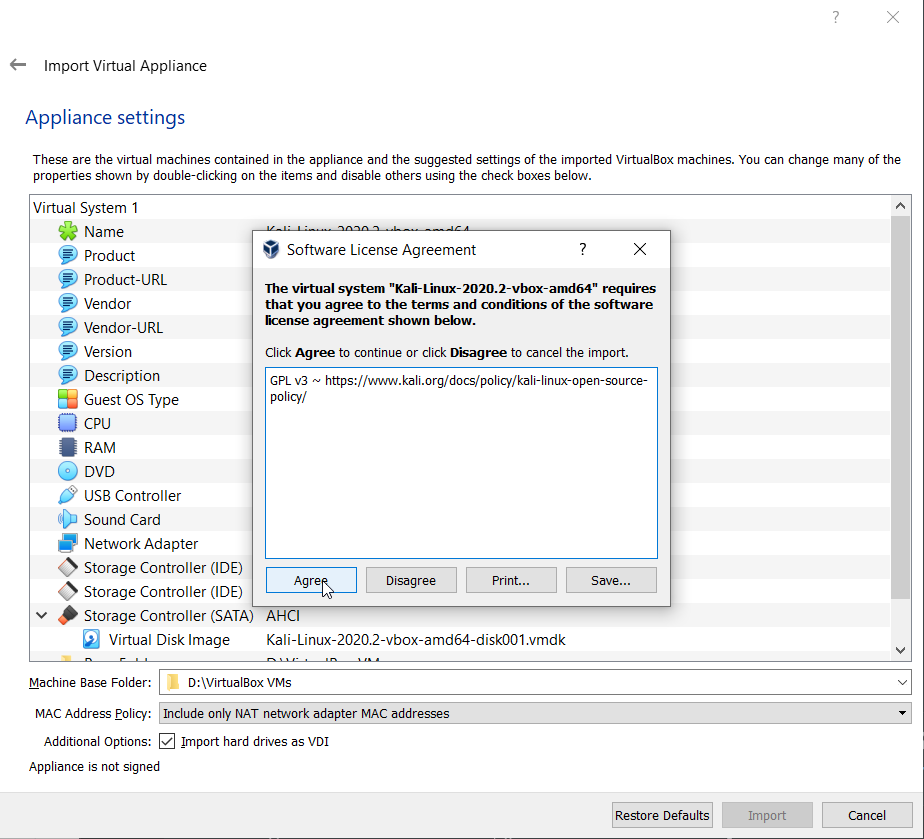
- Accept the Software License Agreement.
- At this point the Kali Linux virtual machine is completely imported. Click Start.
The default username and password is: root:toor
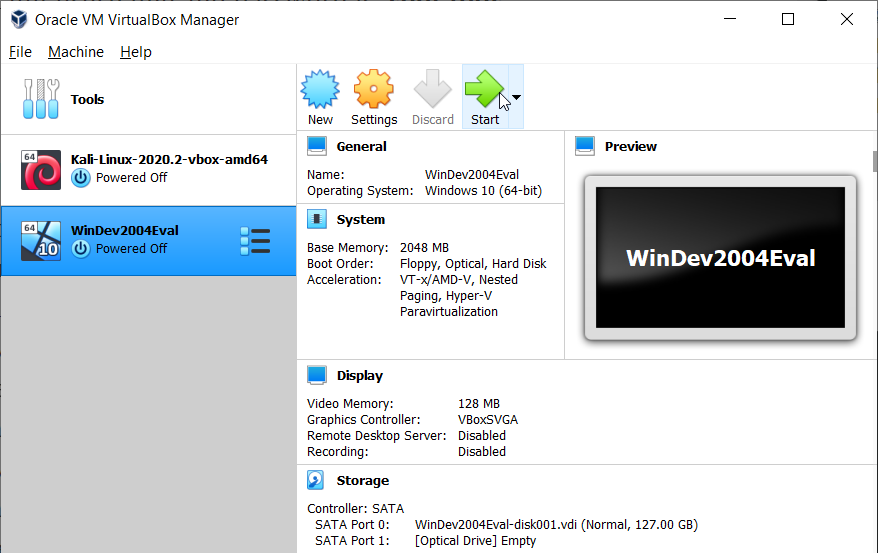
Windows 10
I don’t think Windows or Microsoft need an introduction. However, there are a few things to consider when making a Windows 10 VM. The first thing to know is that Microsoft releases virtual machines of Windows 10 for VMWare, Hyper-V, VirtualBox, and Parallels for free on their developer website. The second thing to know is that these virtual machines are 90-day evaluation licenses. This means that several Windows features will expire after 90 days of creating the virtual machine. There is a small shortcut to combat this via snapshots. However, you will lose your data after reverting to the snapshot. The final thing to consider is that tese virtual machines are only offered via OVA format, meaning you can only import it and not create it from an ISO (for this guide).
You can find the Windows 10 Enterprise virtual machines (.ova) here:
https://developer.microsoft.com/en-us/windows/downloads/virtual-machines/
The following minimum hardware specifications of the Windows 10 Enterprise Virtual Appliance is:
- 1 CPU core
- 2GB RAM
- 20GB download
Install or Snapshot
Install
Once the ZIP file is downloaded and extracted, follow these simple steps to import the virtual machine and create a snapshot:
- Open the VirtualBox Manager and click the Import button.
- Click the icon that looks like a folder with a green up arrow on it to select the OVA file from your local machine.
- Once you find the OVA file you downloaded prior, Click Next.

- VirtualBox will then show you a summary of the configurations set by the virtual appliance file. Click Import if everything looks fine.
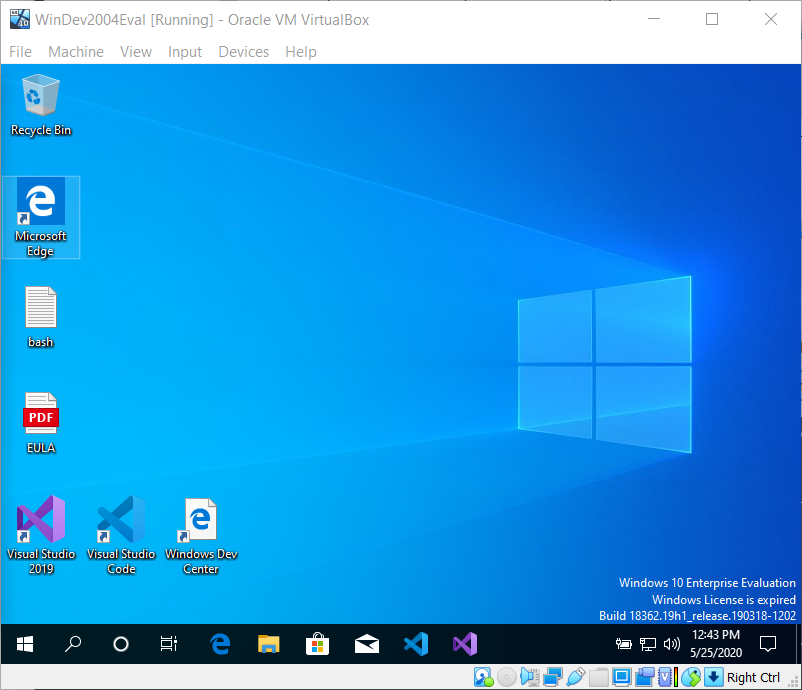
- At this point, the virtual machine is completely imported. I like to Start it to make sure everything works before making a Snapshot.
NOTE: It is also wise to install any tools or configurations you want established before taking a snapshot. Then, once you revert back you will still have your tools fresh and ready to go. For example, If I was creating this virtual machine for network packet analysis, I would download and install Wireshark before creating a Snapshot for the virtual machine.
Snapshot
- Once you have all of the applications and tools installed on your machine you are ready to take a snapshot. Go back to the VirtualBox Manager and right click the virtual machine you’re running, go to Close and Power Off.
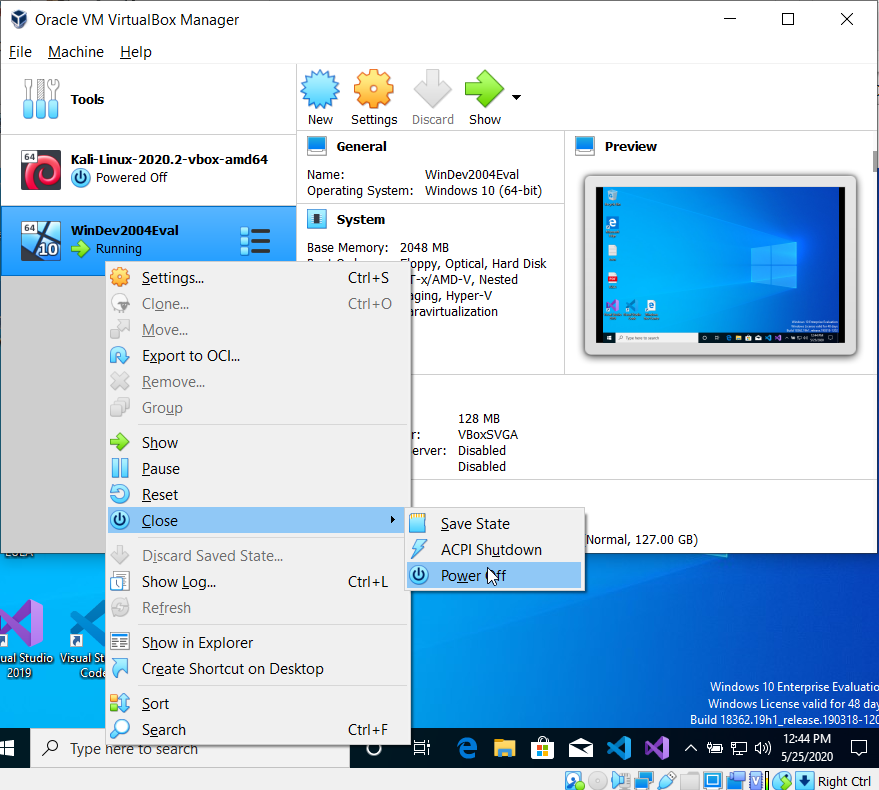
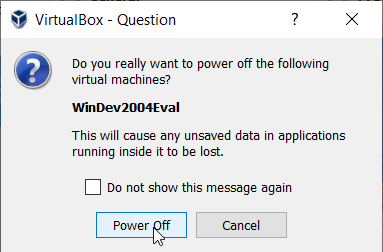
- Then click Power Off on the proceeding modal.
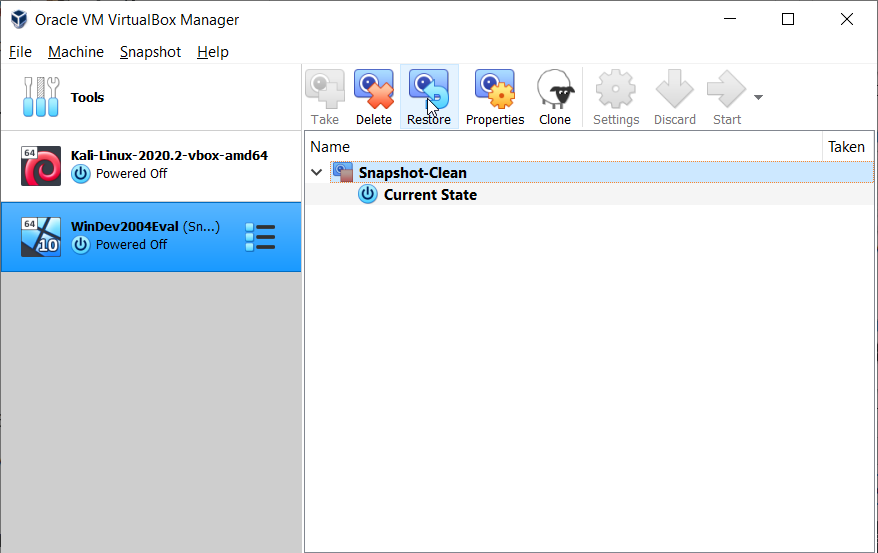
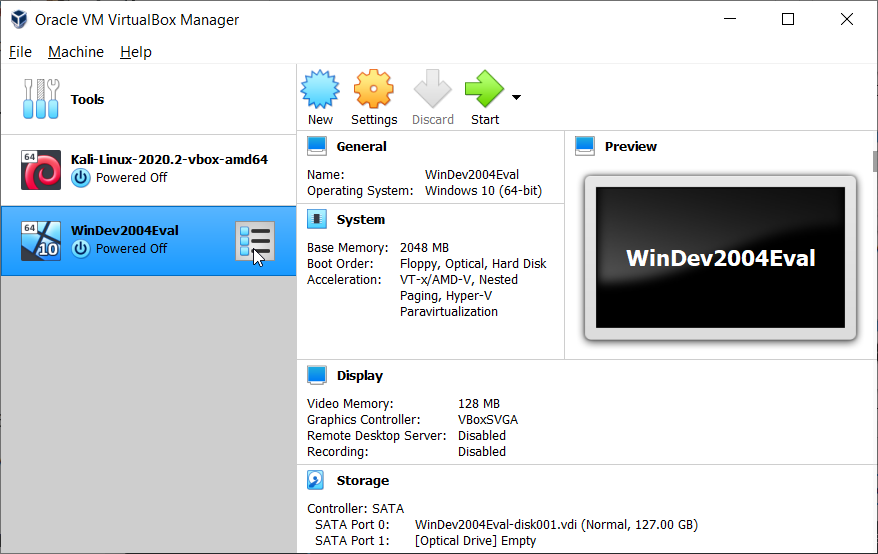
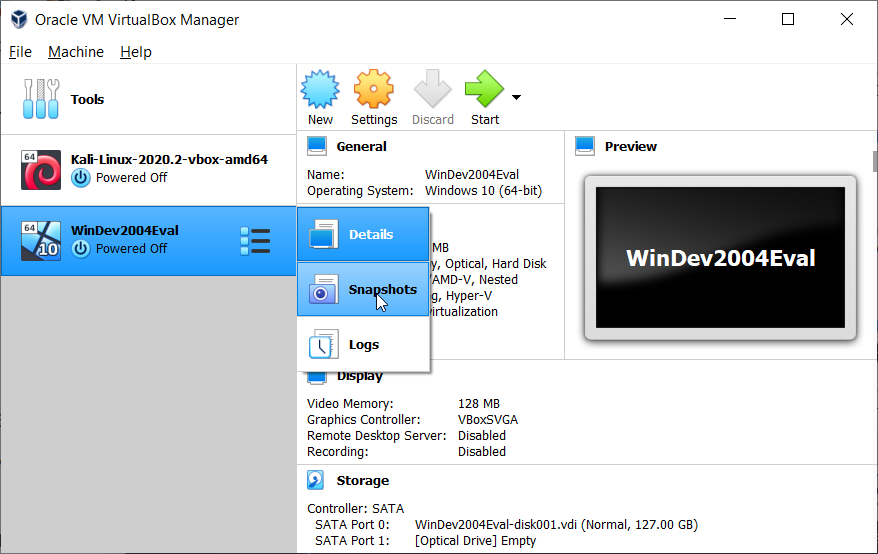
- To take a snapshot, click on the icon next to the virtual machine you are trying to take a snapshot of. It looks like three bullet points with 3 lines of information.
- Click Snapshots on the menu that opens.
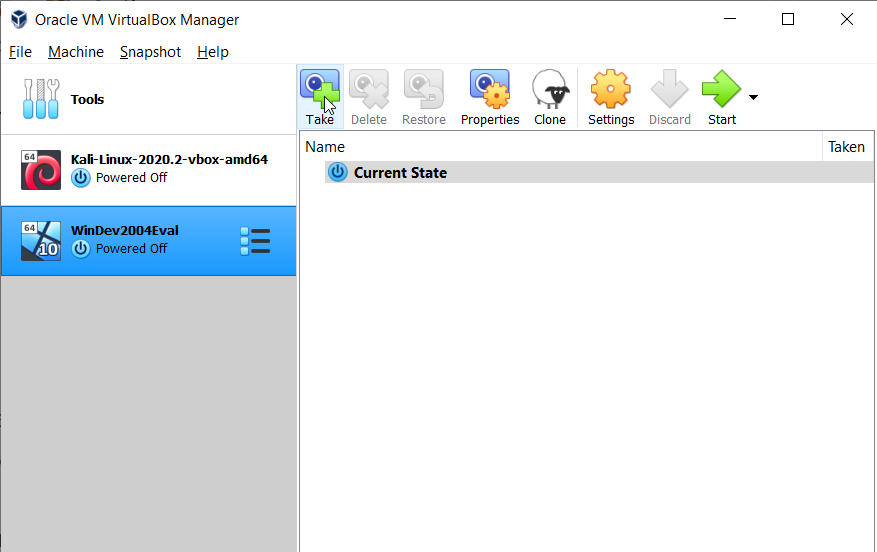
- Click on the Take icon that looks like a camera with a green plus sign.
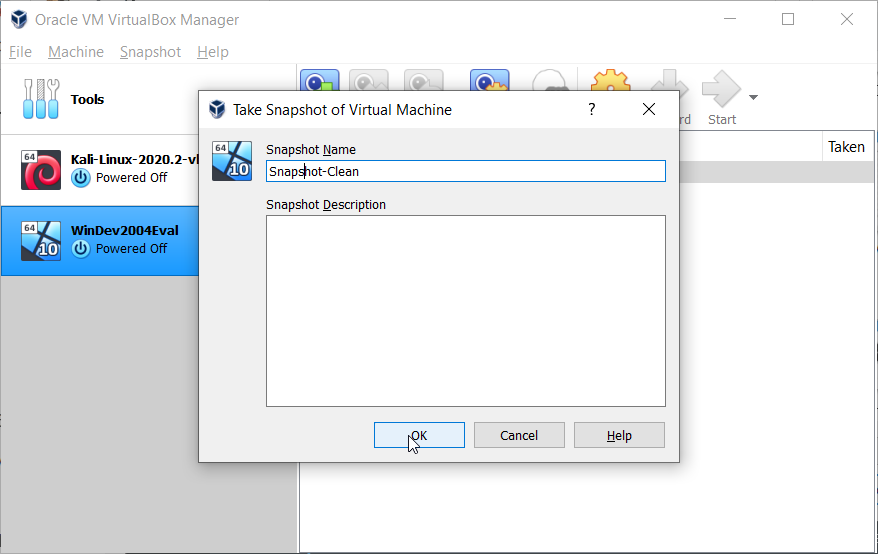
- Name the snapshot something meaningful and make a description if necessary. I just name mine something like clean or fresh.
- That’s it! Once your 90 day license expires or if you break the machine, just return to this screen and click Restore to revent the machine state back to this point.